G’MIC 3.2.5: 15 Years of Development for Open and Reproducible Image Processing
By David Tschumperlé.
Translation: Prawnsushi.
Copyeditor: Garry Osgood.
To celebrate the release of version
3.2.5 of
G’MIC (
GREYC’s Magic for Image Computing), our open
framework for
digital image processing, we present you with a summary of the new features implemented since our
previous report (published during December of 2021). It is also the opportunity for us to celebrate the project's
15 years of existence!
G’MIC is being developed in
Caen, in France, by the
IMAGE team of
GREYC, a public research lab in Information and Communication Sciences and Technologies (Joint Research Unit
CNRS /
ENSICAEN /
Université de Caen). It is distributed under the free
CeCILL licence.
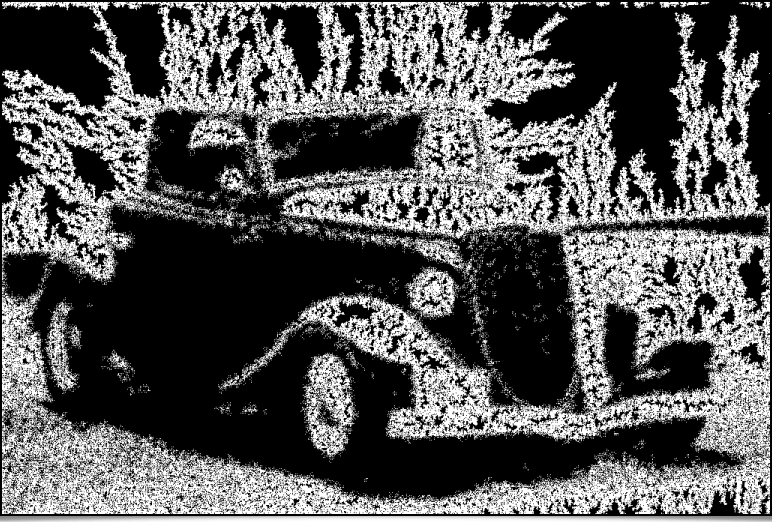
In this report, we will explain in detail a few of the recently added features, and illustrate them with examples of 2D and 3D image processing and synthesis.
A. N. : Click on images to see a full resolution version, or a link to the video for images showing the icon 
1. What is G’MIC ?
G’MIC is an open
digital image manipulation and processing framework. It provides various user interfaces allowing algorithmic manipulation of images and signals. The heart of this project is based on the implementation of a scripting language (the
« G’MIC language »), specifically designed to ease the prototyping and implementation of new image processing algorithms and operators. Users can apply operators among several hundreds already available, but they also have the capability of writing their own processing pipelines and making them available through the various user interfaces of the project. It is therefore, in essence, an open, expandable and constantly evolving framework.
G’MIC 's most accomplished user interfaces are:
gmic, the command line interface (useful addition to
ImageMagick or
GraphicsMagick for people who like to use the terminal), the Web service
G’MIC Online, and above all, the plug-in
G’MIC-Qt, which can be used in numerous popular image editing software such as
GIMP,
Krita,
DigiKam,
Paint.net,
Adobe Photoshop,
Affinity Photo… This plug-in is very easy to use and now provides more than
580 processing filters to augment these image manipulation programs.
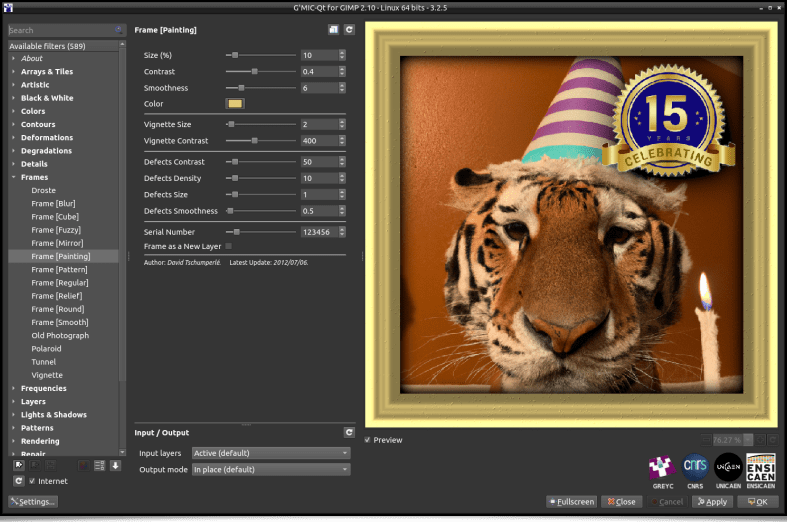 Fig. 1.1. Preview of the G’MIC-Qt plug-in, in version 3.2.5 , here launched from GIMP 2.10.
Thanks to its dedicated scripting language, new filters and effects are regularly added to
G’MIC.
In this article, we will describe a few of these new filter effects and give some news about the project. We will also show some examples for the
gmic command line tool, which is by far the most powerful interface provided by the project.
2. New Abstraction, Glitch Art and Pattern Generation Filters
To begin this new features report, let's mention the existence of a new transformation filter which converts images to
Line Art drawings. This filter, appropriately named
Artistic / Line Art was conceived by
Claude Lion, an external contributor who is already the author of multiple filters (such as the very appreciated
Artistic / Comic Book,
already mentioned in our previous article.
This filter analyses the geometry of the main structures in images and decides if these structures should appear in a picture redrawn on a white background, either as black lines or as gray or black filled regions. It is particularly effective on portraits, since the contrasts are rather well marked marked in this type of images.
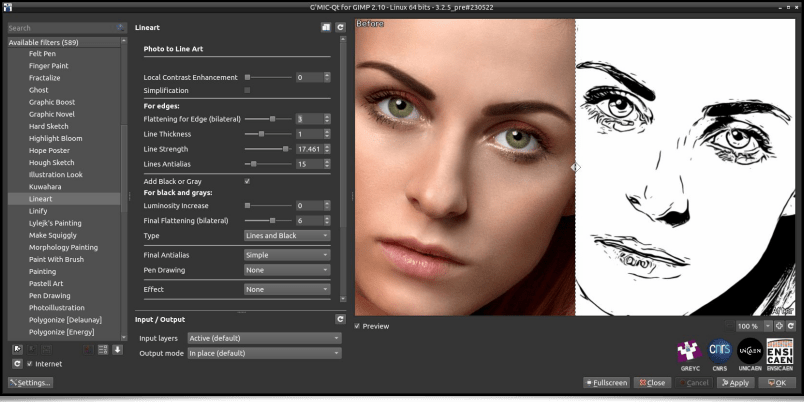 Fig. 2.1. The Artistic / Line Art filter, as seen in the G’MIC-Qt plug-in.
The interactive preview of the
G’MIC-Qt plug-in alleviates the adjustment of all the filter's settings to personalize the expected results. Pressing either the «
Apply » or «
OK » button applies the filter to the picture. Note that once these settings are selected, pressing the «
Copy to Clipboard » button in the plug-in's interface will copy the corresponding
G’MIC command to the clipboard.
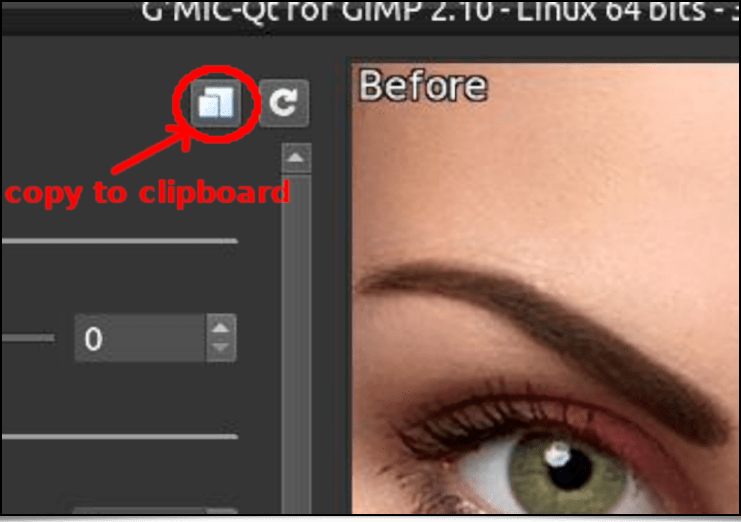 Fig. 2.2. The « Copy to Clipboard » button adds the G'MIC command corresponding to the filter's action to the clipboard.
Then, to apply the effect with the same parameters on different images (for batch processing), all you need is to launch
gmic in a terminal, add the filename of the image to process, followed by the command previously copied to the clipboard, which will give something like this:
$ gmic autre_portrait.jpg cl_lineart 0,0,2,1,15,15,1,0,6,2,2,0,0,0,50,50 output lineart.png
This method is useful when one wants to use certain
G’MIC effects inside personalized scripts (this obviously works with all the filters available in the plug-in).
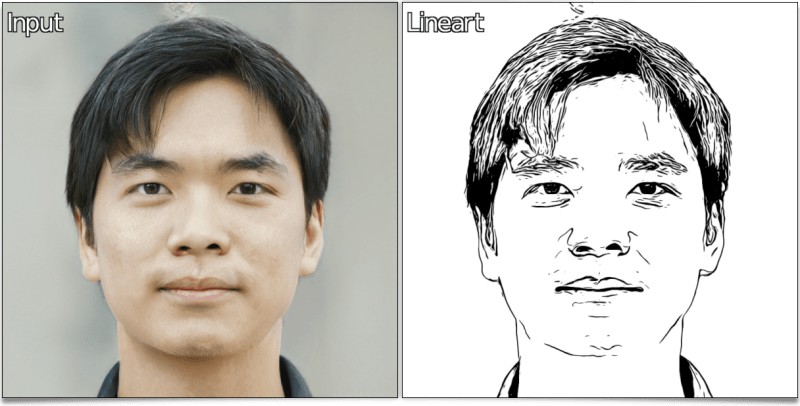 Fig. 2.3. The « Line Art » filter, applied on another portrait image, with the same settings, from the terminal.
 Fig. 2.4. The « Line Art » filter, applied on a few other example images.
Now, let's take a look at the
Degradations / Huffman Glitches filter, a fun way to generate
Glitch Art. More precisely, here we will simulate image decompression artifacts with the deliberate addition of errors (bits inversion) in the
Huffman codes which would have been used for the lossless compression of the input picture's data. This produces visible digital distortions on the picture when the altered data is decompressed, distortions which actually are the effects sought by the
Glitch Art aficionados!
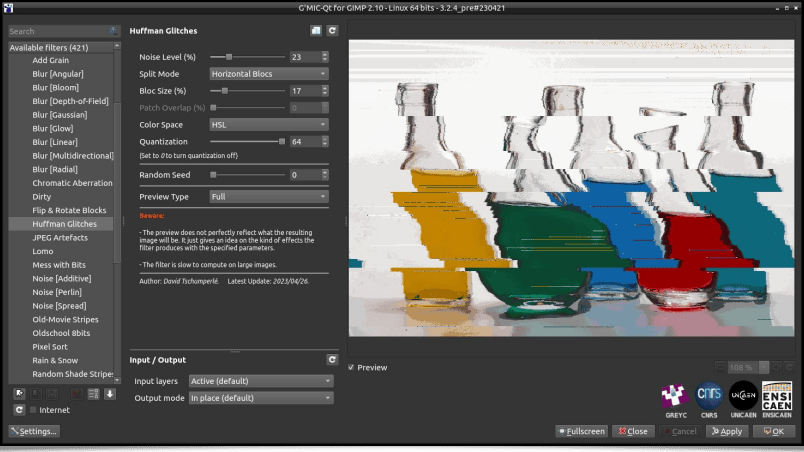 Fig. 2.5. The Degradations / Huffman Glitches filter, as seen in the G’MIC-Qt plug-in.
This filter allows the generation of compression artifacts with variations: block by block, line by line, column by column, or on image data encoded in color spaces other than
RGB. In the end, the diversity of anomalies it is possible to produce is quite large, as depicted on the following figure:
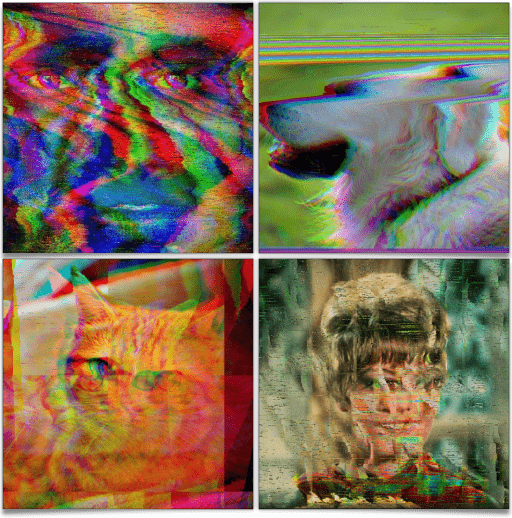 Fig. 2.6. A few variations of the Degradations / Huffman Glitches filter settings.
Here again, it is easy to retrieve the
G’MIC command corresponding to the filter's operation, use it in a script, and, for example, apply this effect on all the
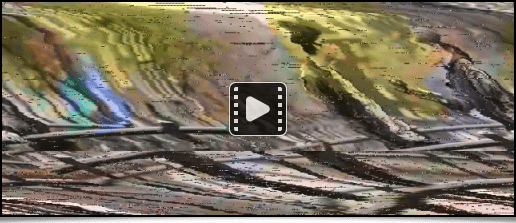
frames of a video (click on the picture below to view the video):
There floats like the sweet scent of an analog TV set in the air...☺
Let's also mention the appearance of a new filter, named
Patterns / Pack Ellipses, which may not be entirely pleasing to our
trypophobic readers (not at all related to the phobia of eating "tripes à la mode de Caen" )! The goal of this filter is to redraw an image by fitting together colored ellipses, yet preventing them to touch each other. Ellipses are oriented parallel or orthogonal to the local structures, to make the most visible edges of images stick out. This is not the first filter of this kind in
G’MIC, but here we have a new
sphere packing algorithm, which executes quickly and produces interesting pictures.
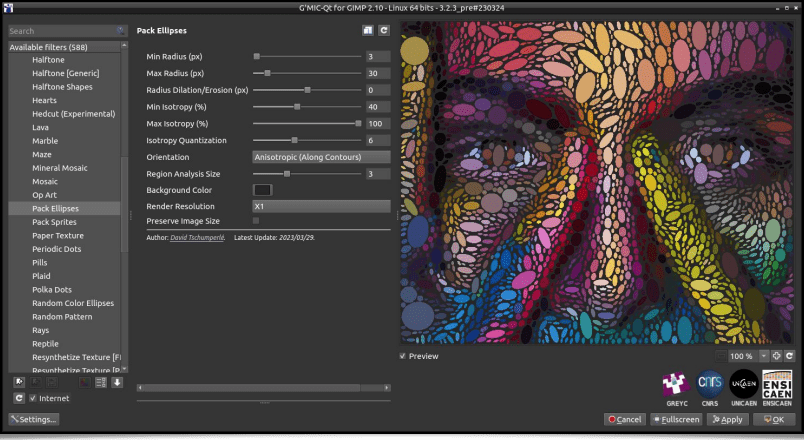 Fig. 2.8. The Patterns / Pack Ellipses filter, as seen in the G’MIC-Qt plug-in.
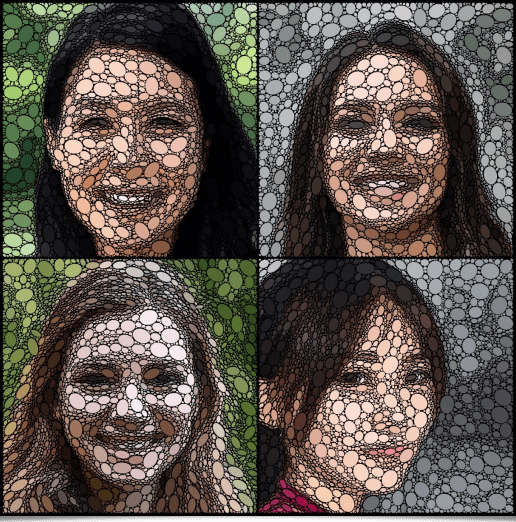 Fig. 2.9. Application of the Patterns / Pack Ellipses filter on different portrait images.
The video below is a step by step illustration of the algorithm's behaviour while fitting colored circles to reconstruct a portrait image:
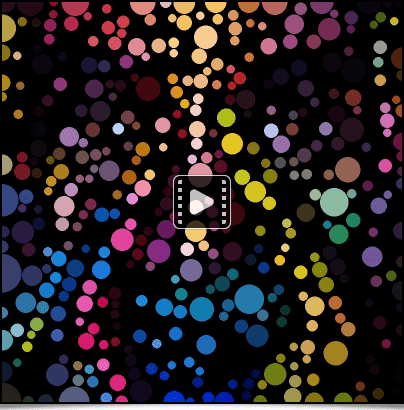 Fig. 2.10. A video breakdown of the different steps of the Patterns / Pack Ellipses filter.
Still among the textures and patterns generation effects, let's point out the appearance of a new
Halftoning filter, named
Patterns / Halftone [Generic]. Here again, the idea is to reconstruct an input image by stacking small colored patterns of any shape, such as small circles for instance:
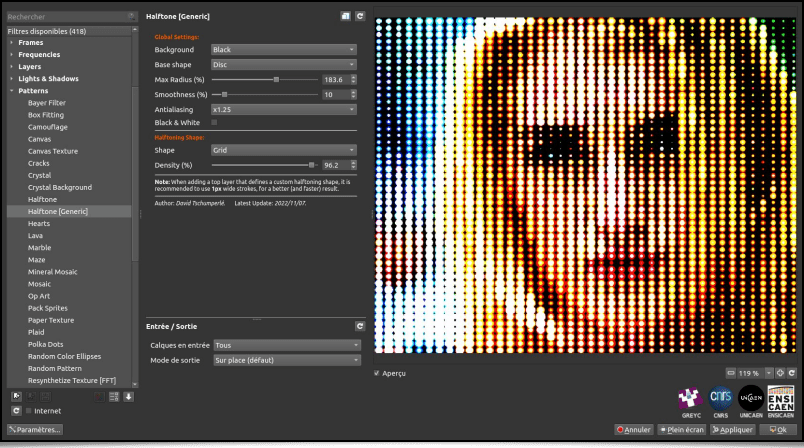 Fig. 2.11. The Patterns / Halftone [Generic] filter, as seen in the G’MIC-Qt plug-in.
Or a spiral :
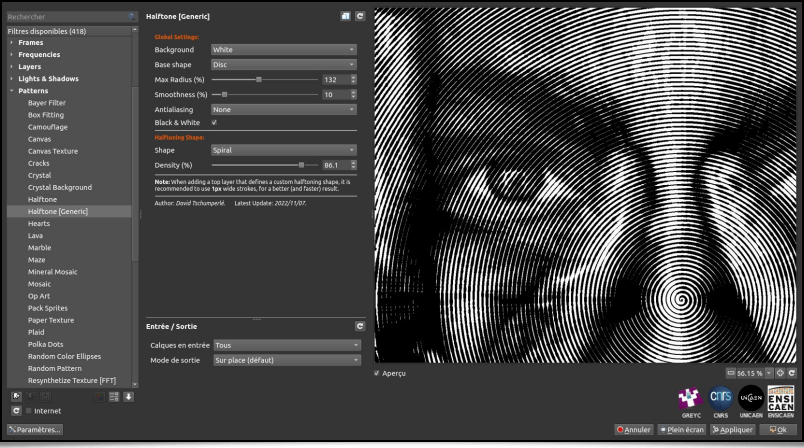 Fig. 2.12. The Patterns / Halftone [Generic] filter with a spiral pattern.
The filter even provides a special mode so that the user can provide his own personalized
Halftoning pattern design on a separate layer:
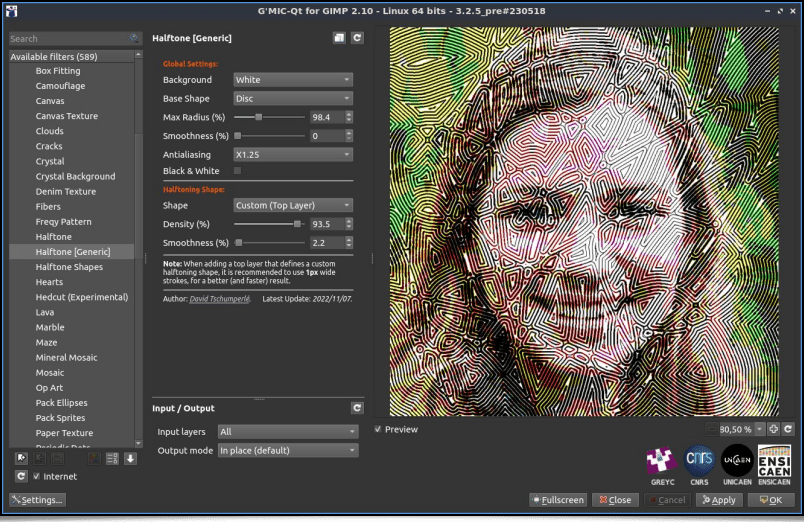 Fig. 2.13. The Patterns / Halftone [Generic] filter with a personalized pattern design.
From an algorithmic point of view, the idea is to locally erode or dilate the pattern passed as a filter parameter to best encode the grayscale value of each pixel of the input image.
The following filter has an amusing story: subscribed to the
Twitter account of the artist
Memo Akten, one day I stumbled upon
this tweet describing a generative art algorithm that Memo imagined (but did not implement). It was a good opportunity to try to implement it in the
G’MIC language, just for the fun of experimenting! Once it was done, creating a filter usable from the
G’MIC-Qt plug-in was self-evident. The result is the
Rendering / Algorithm A filter, which creates «
Mondrian-like » abstract illustrations.
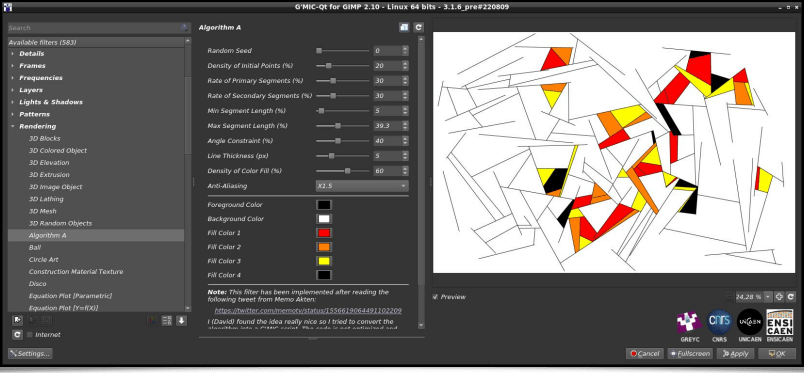 Fig. 2.14. The filter Patterns / Algorithm A, as seen in the G’MIC-Qt plug-in.
Image generation is largely based on drawing random numbers. From a simple command line, one can easily produce many different artworks in one go:
$ gmic repeat 6 { 500,500,1,3 fx_memoakten_algorithm_a[-1] '$>',20,30,30,2,50,10,50,40,3,60,1,0,0,0,255,255,255,255,0,0,255,128,0,255,255,0,0,0,0 } frame 1,1,0 frame 5,5,255 append_tiles 3 output output.png
which synthesizes the following image:
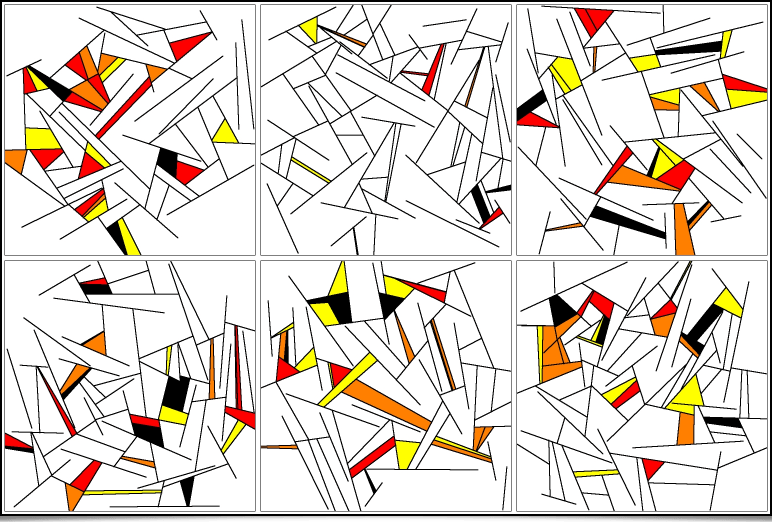 Fig. 2.15. An « artworks » Patchwork produced by the Patterns / Algorithm A filter.
Still in order to produce bizarre and abstract pictures, let's talk about the Arrays & Tiles / Shuffle Patches filter, which will break down an input image into a thumbnail array (« patches »), then shuffle these patches spatially before joining them to produce the resulting image. Different options are offered, allowing a random rotation of the patches, or reassembling overlapping patches.
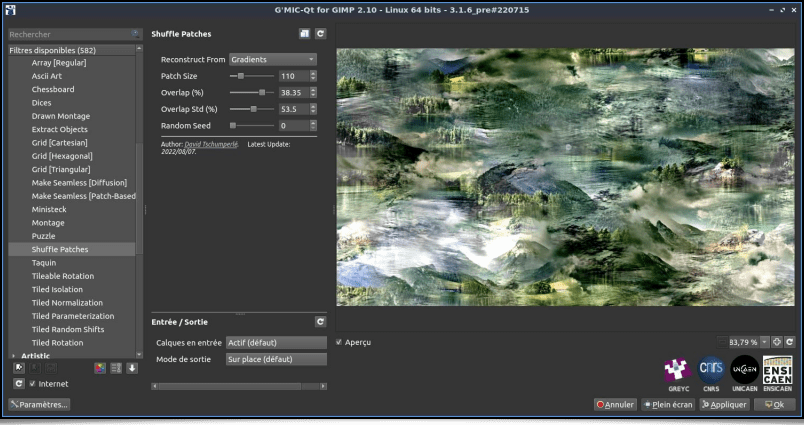 Fig. 2.16. The Arrays & Tiles / Shuffle Patches filter, as seen in the G’MIC-Qt plug-in.
The result is an image resembling a patchwork of different parts of the original picture, with overall similar colors, but where the natural order of structures is lost.
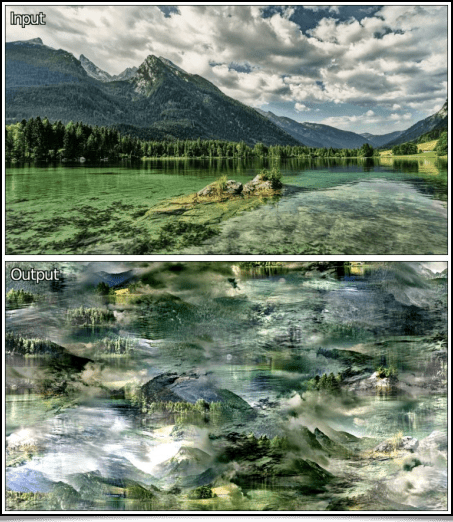 Fig. 2.17. Result of the Arrays & Tiles / Shuffle Patches filter applied to a landscape picture.
And again, we can apply this filter to all the
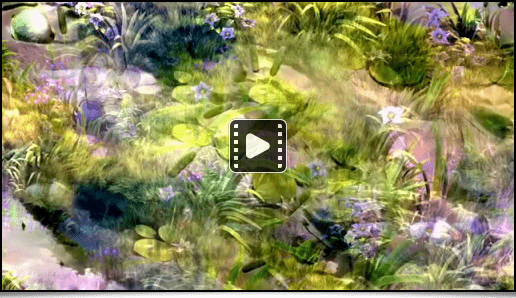
frames of a video, as illustrated in the example below (of course you will have recognized the short movie
Big Buck Bunny by the
Blender Foundation).
And to close this section about image abstraction, Glitch Art and pattern generation, here is the Patterns / Pills filter, which creates a periodic (repeating) texture resembling a stack of « pills » rotated 90° to each other.
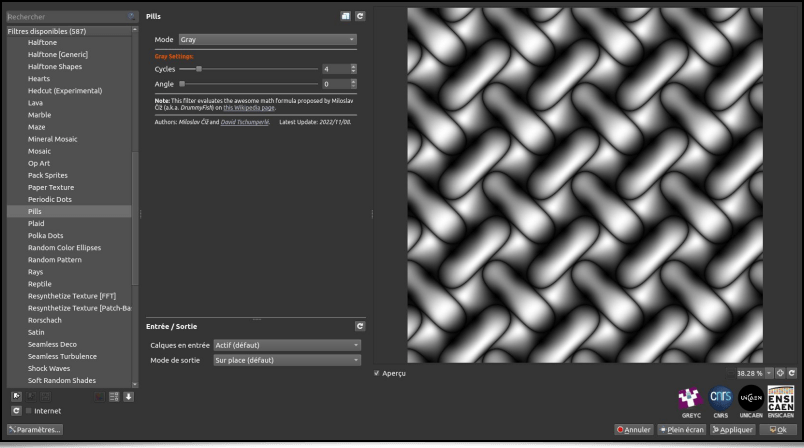 Fig. 2.19. The Patterns / Pills, as seen in the G’MIC-Qt plug-in.
Nothing too complicated: this filter is a straight implementation of the following mathematical formula:
This nice formula was imagined by
Miloslav Číž, and described on
this page. It was tempting to create a new filter available to everyone!
Note that we can produce the same base image, directly from the original formula, once again by executing the
gmic command line:
$ gmic 600,600,1,1,"X = x*30/w; Y = y*30/h; sqrt(abs(sin(X + cos(Y + sin(X + cos(Y)))) * sin(Y + cos(X + sin(Y + cos(X))))))" normalize 0,255
Nevertheless, the
Patterns / Pills found in the
G’MIC-Qt plug-in allows some additional variations, like the possibility of specifying a rotation angle or independently creating these patterns for each
RGB channel of the output image.
3. Some News Regarding Color Processing
3.1. LUTs 3D Features
G’MIC is an image processing software natively integrating a lot of different
3D color_LUTs, thanks, in particular, to an efficient
LUTs compression algorithm resulting from our research work (described
in a previous report). These 3D color
LUTs define transformation functions of an image's colors, often to give it a specific ambiance. New commands to facilitate the visualization and creation of 3D color
LUTs were recently added to
G’MIC:
The
display_clut command renders a color
LUT in 3D, which allows to visualize the
RGB → RGB transformation it represents.
$ gmic clut summer clut spy29 display_clut 400 text_outline[0] Summer text_outline[1] "Spy 29"
will display:
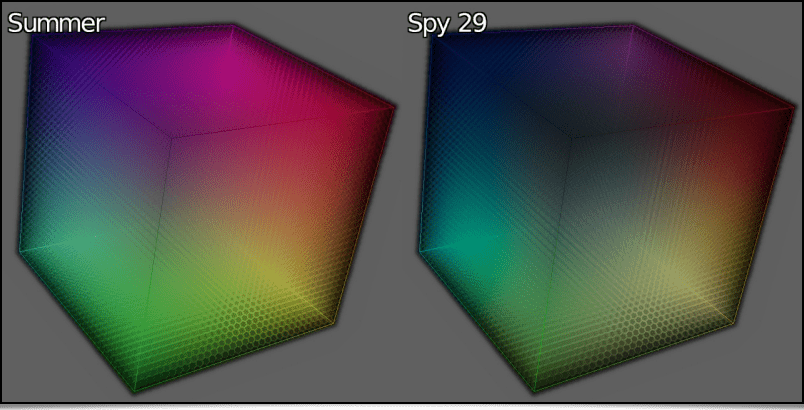 Fig. 3.1.1. The display_clut command renders a color LUT in 3D.
As for the
random_clut command, it creates a random 3D color
LUT preserving some properties of color continuity. For example, the following pipeline:
$ gmic sample colorful resize2dx 320 repeat 4 { random_clut +map_clut[0] [-1] display_clut[-2] 320 to_rgb[-2] append[-2,-1] y } frame 2,2,0 to_rgba append x,1
will synthesize an image like the one below:
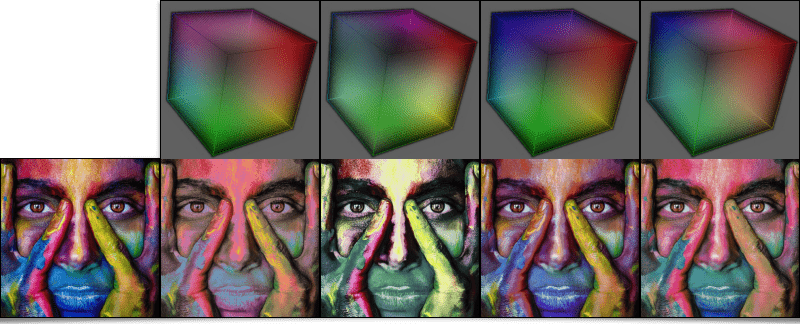 Fig. 3.1.2. Multiple randomized 3D color LUTs obtained via the random_clut command, and applied to a color image.
3.2. New Color Filters for the G'MIC-QT Plug-in.
Quite logically, the random_clut command is the basis for the implementation of the new Colors / Random Color Transformation filter, which was added to the G’MIC-Qt plug-in and applies a random colorimetric transformation on an input image.
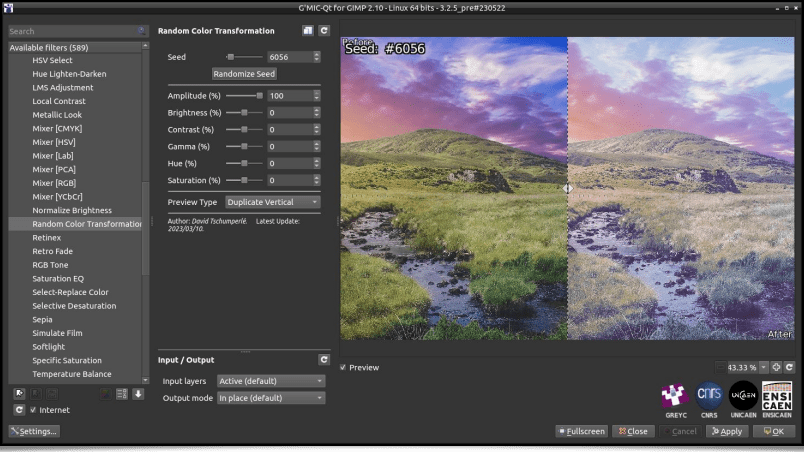 Fig. 3.2.1. The filter Colors / Random Color Transformation, as seen in the G’MIC-Qt plug-in.
To stay in the field of 3D color LUTs, let us mention the appearance of the filter Colors / Apply From CLUT Set, which allows transforming a color image by applying one of the 3D LUT defined in a pack, itself stored in a .gmz file format.
Some explanations are needed: the
.gmz file format is implemented and used by
G'MIC for the serialization and backup of compressed generic binary data. Thus, how do we create a
.gmz file storing a set of compressed 3D color
LUTs, to supply the
Colors / Random Color Transformation filter? Let's take the actual example of the
pack of 10
LUTs generously offered
on this web page. These
LUTs are provided in
.cube file format, the most common file type used for storing 3D color
LUTs. This set of 10 files takes up
8.7 MB on the drive.
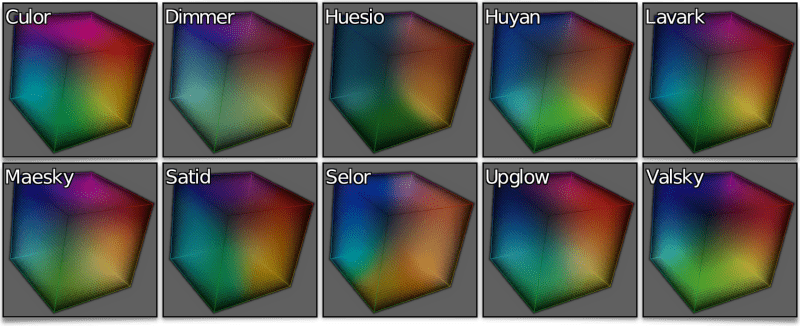 Fig. 3.2.2. visualization of the 10 3D color LUTs from our example case.
The following command line compresses them (with visually imperceptible loss) thanks to
G’MIC's LUTs compression algorithm, to a
clut_pack.gmz file weighting
156 KB. Be careful, this compression process takes time (several tens of minutes)!
$ gmic *.cube compress_clut , output clut_pack.gmz
Once this file containing a
pack of
LUTs is generated, these 10 transformations are available via the
Colors / Apply From CLUT Set filter, by specifying the
clut_pack.gmz file as a parameter, as illustrated below.
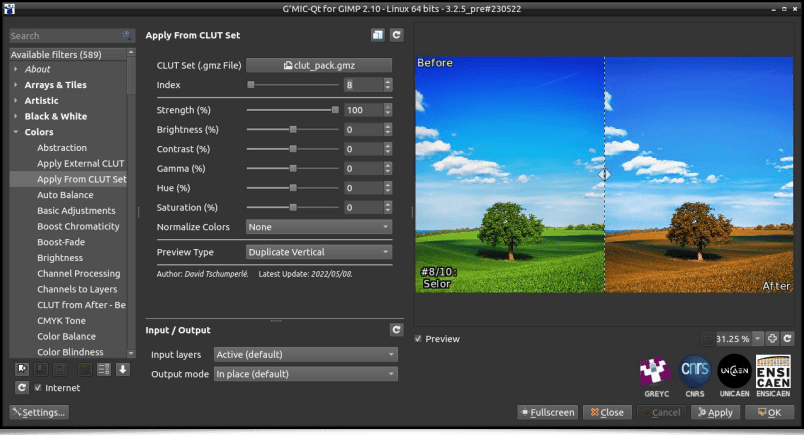 Fig. 3.2.3. The Colors / Apply From CLUT Set filter, as seen in the G’MIC-Qt plug-in.
So here is a filter that avoids storing
sets of 3D color
LUTs of several megabytes to disk!
To stay in the field of colorimetric transformations, here is the recent
Colors / Vibrance filter, which makes the colors of your images ever more shimmering. There are other comparable filters available in
G'MIC, but we thus have an alternative to the other similar algorithms already present. This filter comes from the user
Age who occasionally participates to discussions on our
forum, hosted by our friends at
PIXLS.US (from which
Pat David, who also contributes to the
GIMP project, is the instigator).
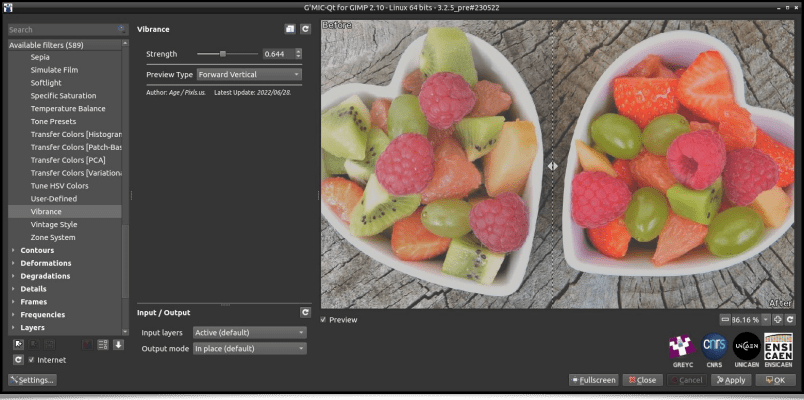 Fig. 3.2.4. The Colors / Vibrance filter, as seen in the G’MIC-Qt plug-in.
3.3. The color2name and name2color Commands
One last new feature concerning colors: the
color2name and
name2color command duo, which convert an
RGB color code to a color name, and vice versa. One example of use would be:
$ gmic 27,1,1,3 rand 0,255 split x foreach { color2name {^} resize 300,100 text_outline '${}',0.5~,0.5~,28 } frame 1,1,0 append_tiles 3
This pipeline builds a randomized array of named colors, in the shape of an image such as this one:
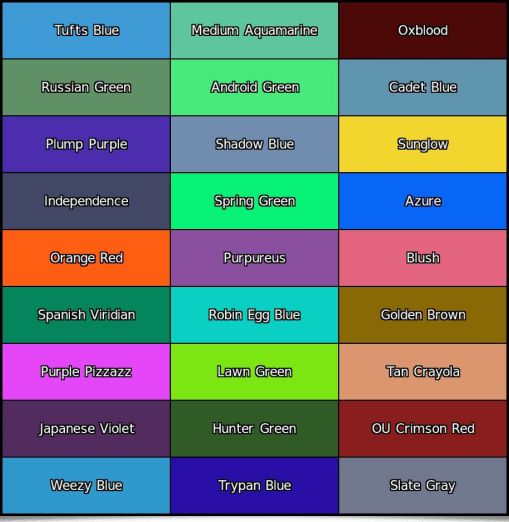 Fig. 3.3.1. An example use of the color2name command to name random colors.
The relation between the 881 color names recognized by these commands and their respective
RGB codes were gathered from
this Wikipedia page. Below, the whole set of these 881 colors are represented in the
RGB cube:
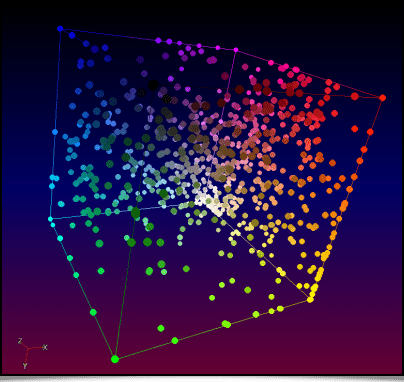 Fig. 3.3.2. The whole set of named colors known to the color2name command.
4. 3D Mesh and Voxel Structures
Did you know? Not only can
G'MIC manage regular images, but it is also able to manipulate
3D mesh objects? And even if 3D visualization and manipulation are not central objectives to the project, several interesting additions were implemented in this area.
4.1. Importing Objects in the Wavefront File Format
First of all,
G’MIC can now import 3D objects stored in
Wavefront .obj files, whereas previously only exporting was possible in this format (export which was also improved). Not all the characteristics of the
.obj format are taken into account, but importing object geometry, colors and textures commonly works. Thus, the command:
$ gmic luigi3d.obj display3d
allows importing a 3D object to visualize it in a new window, as is depicted in the animation below.
A word of warning: the viewer integrated into
G'MIC doesn't benefit from
GPU graphic acceleration. Rendering may be quite slow if the mesh is made of many vertices (a clue for future improvement?).
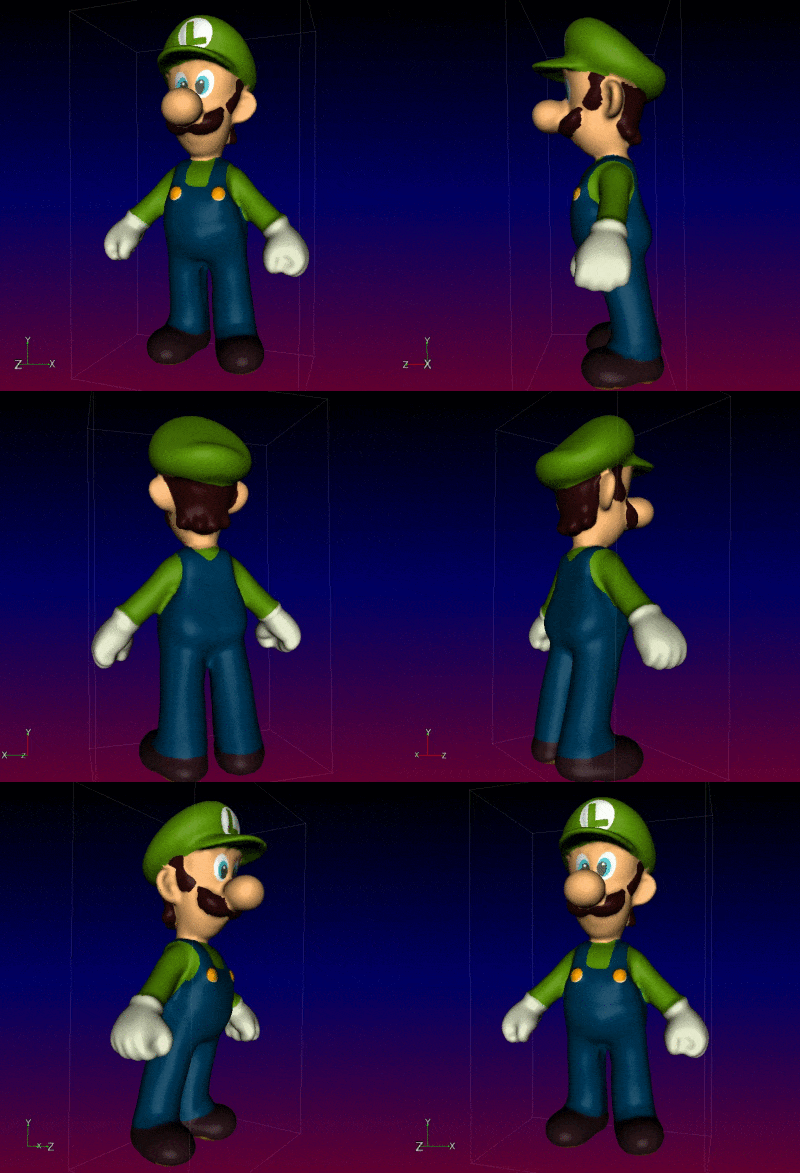 Fig. 4.1.1. Import and visualization of a textured 3D mesh in G'MIC.
Naturally, we have integrated this new 3D mesh import feature in the
G’MIC-Qt plug-in, with the new
Rendering / 3D Mesh filter, which allows importing an
.obj file and inserting a 3D render in an image, as shown in the video below:
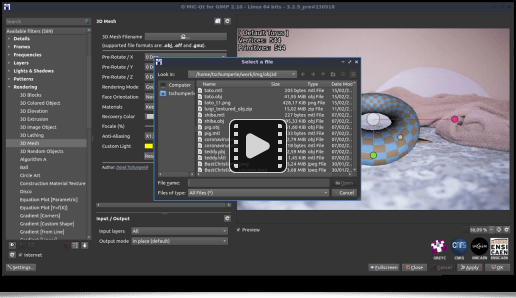 Fig. 4.1.2 The Rendering / 3D Mesh filter in action, in the G’MIC-Qt plug-in.
It will be typically used to import a 3D object one wants to draw, orient it in space, and use it as a tracing « guide », either by redrawing it completely on a new layer placed above, or by using one of the many
G’MIC filters, to render it as a
cartoon drawing or a painting for example.
4.2. 3D Mesh Modification Tools.
What else is there to do once the 3D mesh is loaded in memory/RAM?
G’MIC has the following features:
Texture extraction, thanks to the new
extract_textures3d command. The next 3 figures illustrate the case of a 3D mesh object depicting a cat, from which the texture is extracted and transformed with a stylization filter (modeled after the japanese print
The Great Wave off Kanagawa), then reapplied to the cat.
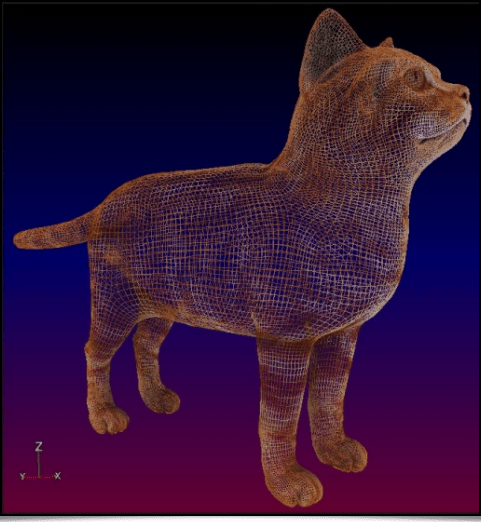 Fig. 4.2.1. View of a 3D mesh object depicting a cat, with its texture.
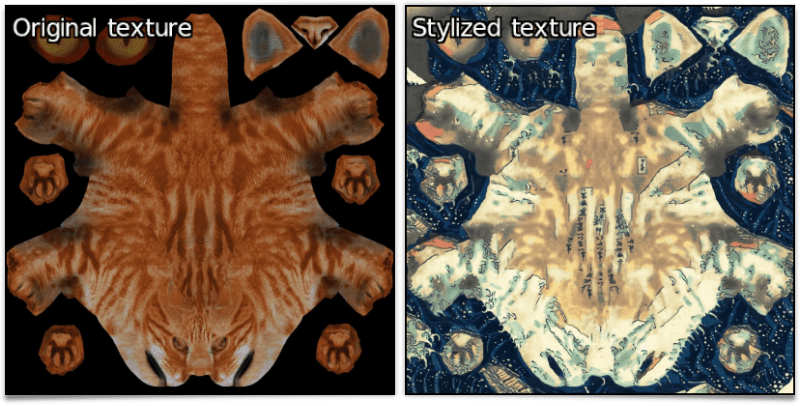 Fig. 4.2.2. Texture extraction and stylization, via the extract_textures3d command.
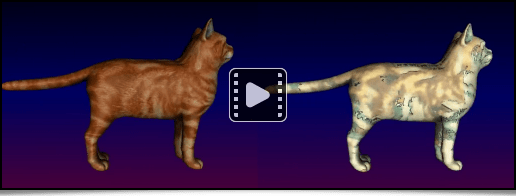 Fig. 4.2.3. View of the original 3D mesh and its stylized version.
A 3D object's faces can also be subdivided, thanks to the new
subdivide3d command.
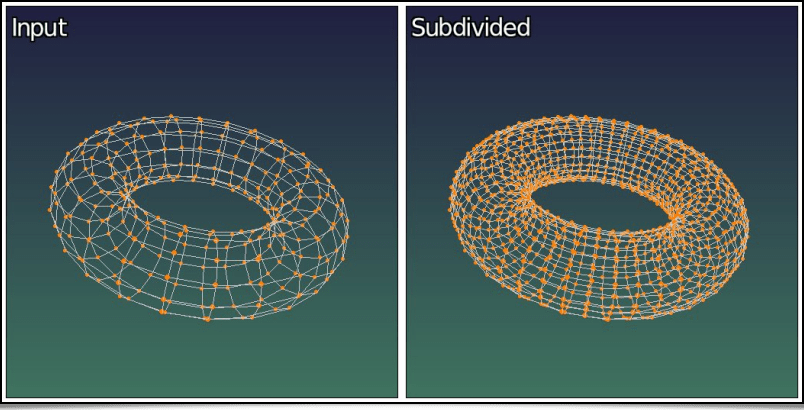 Fig. 4.2.4. Subdividing the faces of a 3D tore mesh with the subdivide3d command.
A
textured 3D object can be converted to solely
colored, with the
primitives3d command. The following command line applies this process on the
Luigi3d model previously introduced, to remove its texture and replace it with colored faces:
$ gmic luigi3d.obj primitives3d 2 output luigi3d_no_textures.obj
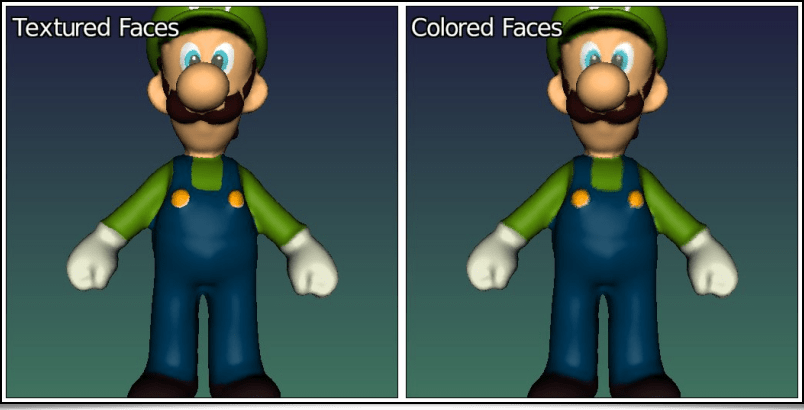 Fig. 4.2.5. Converting textured primitives to simply colored primitives, with the primitives3d command.
The average color of each face is computed from the colors of all of its vertices. For large faces, it might be very useful to subdivide the model beforehand, to get a high enough resolution of the colored texture in the final object (using the
subdivide3d command).
Finally, a 3D mesh object can also be converted to a
volumetric image containing a
voxels set, with the new
voxelize3d command. This command reshapes all the base primitives making up a 3D model (vertices, faces, edges, spheres) as discrete primitives traced in the volumetric image. For example, this command line:
$ gmic skull.obj voxelize3d 256,1,1 output skull_voxelized.tif display_voxels3d
will reshape the skull mesh illustrated below as a volumetric image made of colored voxels, that we can view with the new
display_voxels3d command. Hence the very «
Minecraft-like » render (voxelized below at different resolutions):
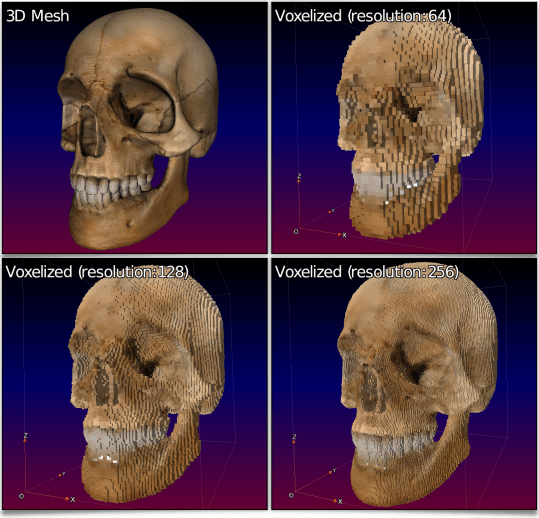 Fig. 4.2.6. Converting a textured 3D mesh to a volumetric image made of colored voxels, with the voxelize3d command.
This feature will be useful, for example, to people studying the field of discrete geometry, who will be able to easily generate complex discrete 3D objects from meshes (more than often easier to create than their dicsrete counterparts!). The video below illustrates the render of a discrete 3D model thus created:
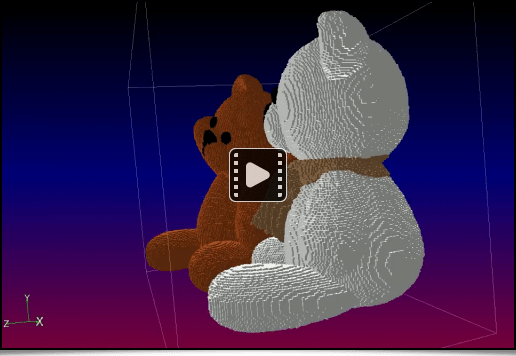 Fig. 4.2.7. Visualization video of a complex 3D mesh voxelized by the voxelize3d command.
4.3. 3D Mesh Generation Tools
To conclude this section about 3D meshes in
G’MIC, let's mention, in no particular order, the appearance of a few recent commands dédicated to 3D mesh procedural generation:
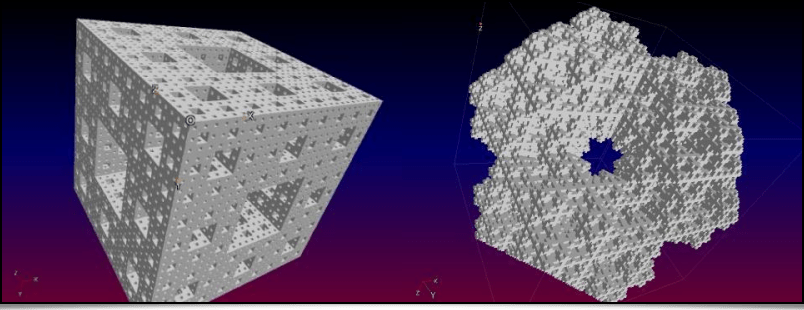 Fig. 4.3.1. 3D renders of the Menger sponge and the Mosely snowflake, created with the shape_menger and shape_mosely commands.
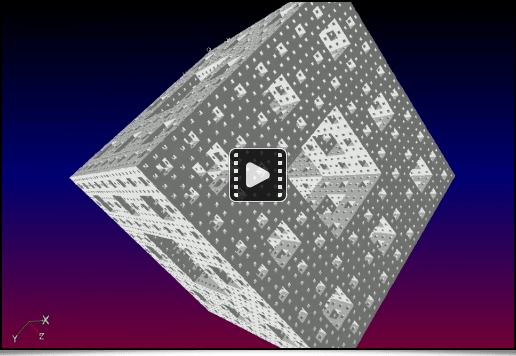 Fig. 4.3.2. Video of a Menger sponge, rendered by G'MIC.
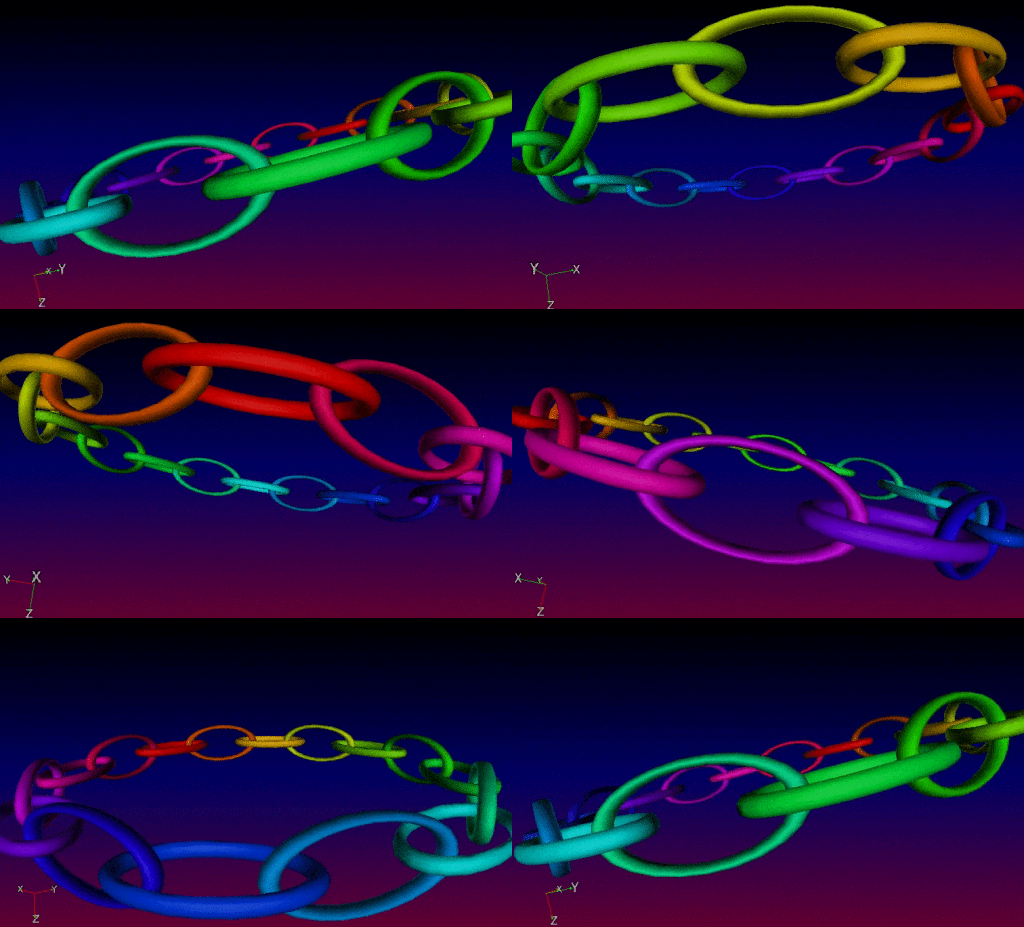 Fig. 4.3.3. Rendering a ring of 3D color tores with the chainring3d command.
The
curve3d generates the 3D mesh of the parametric curve
t → (x(t),y(t),z(t)), with the optional
r(t) radius thickness, which is also parametric.
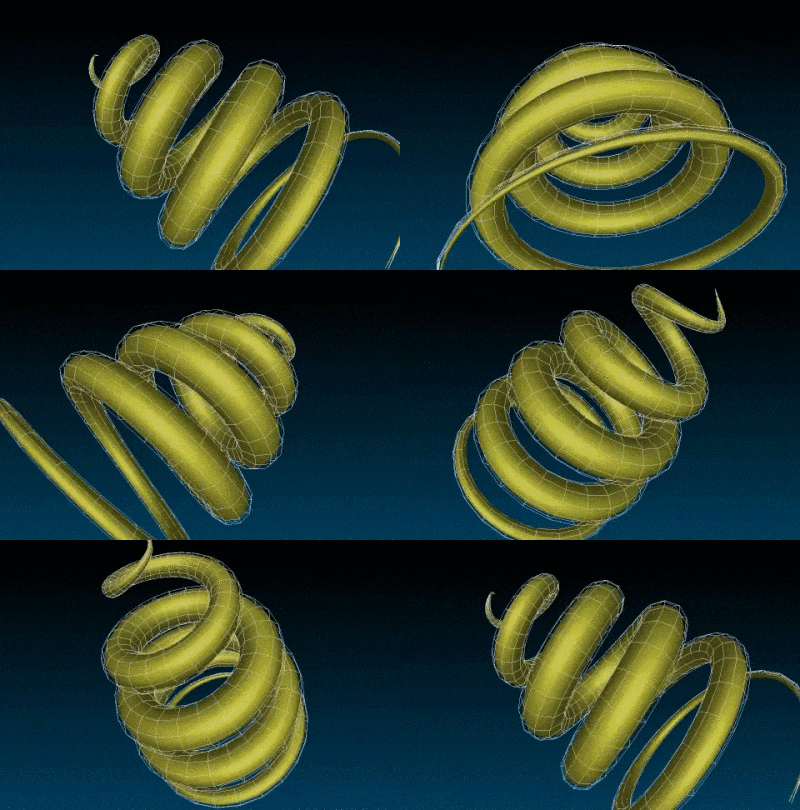 Fig. 4.3.4. Rendering a 3D parametric curve, created with the curve3d command.
The
sphere3d) command is now able to generate 3D spherical meshes using three different methods: 1. isocahedron subdivision, 2. cube subdivision, and 3. the angular discretization in spherical coordinates. They are illustrated below, from left to right:
 Fig. 4.3.5. Creation of 3D spherical meshes, with three different mesh algorithms, via the sphere3d command.
In practice, all these new 3D mesh generation commands can be inserted into more complex
G’MIC pipelines, in order to proceduraly form sophisticated 3D objects. These meshes can then be exported as
.obj files. It is illustrated here, with the creation of a recursive chain ring which was firstly generated by
G’MIC (using the
chainring3d command as the base element as well), then imported into
Blender :
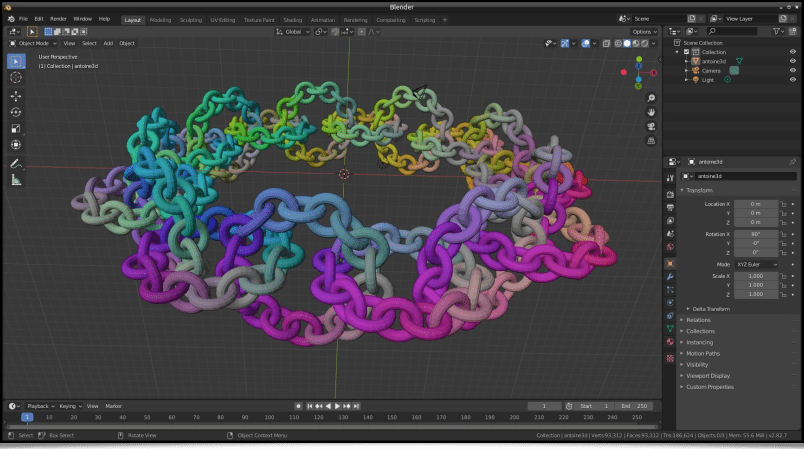 Fig. 4.3.6. Procedural generation of an object with G’MIC, then imported into Blender.
5. Other News
This last section gives some new informations related to the project, in no particular order.
5.1. Various Improvements of the G'MIC-Qt Plug-in
A lot of work has been done on the
G’MIC-Qt plug-in's code, even if not's not really visible at first. Let's mention in particular :
Some code important optimizations which improve the plug-in's start up time: the plug-in window is displayed faster, the filter parser is more efficient, notably due to the use of a binary cache storing the analyzed filters' information after an update.
Some improvement regarding plug-in stability. It more effectively handles threads launched by unfinished filters.
A change in the interface's theme, which defaults to dark mode.
The filter's elapsed/execution time is now displayed when the « Apply » button is clicked.
A new
external filter sources management system: it becomes easy for a developper to share his personalized
G’MIC filters with a user, by giving him a file or an URL pointing to their implementation (in the same way a
PPA works for package managers in
Ubuntu ).
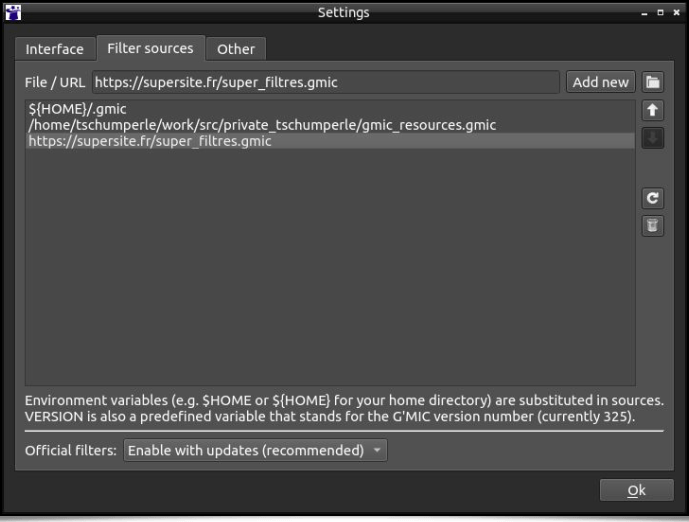 Fig. 5.1.1. The new external filter sources management system in the G’MIC-Qt plug-in.
The plug-in provides a way for filters to store persistent data in a memory cache across consecutive calls. This allows filters that need to load or generate large data, to only do it once, and reuse it in successive calls. This method is used by the Rendering / 3D Mesh filter to store a 3D object loaded from a file.
Plugin-in code has been modified to alleviate the future transition to version 6 of the Qt library.
Let's finally mention the plug-in's update for the latest version of
Digikam (v. 8.0.0), thanks to
Gilles Caulier's work.
A
detailed/provided documentation was put online to
Digikam's website.
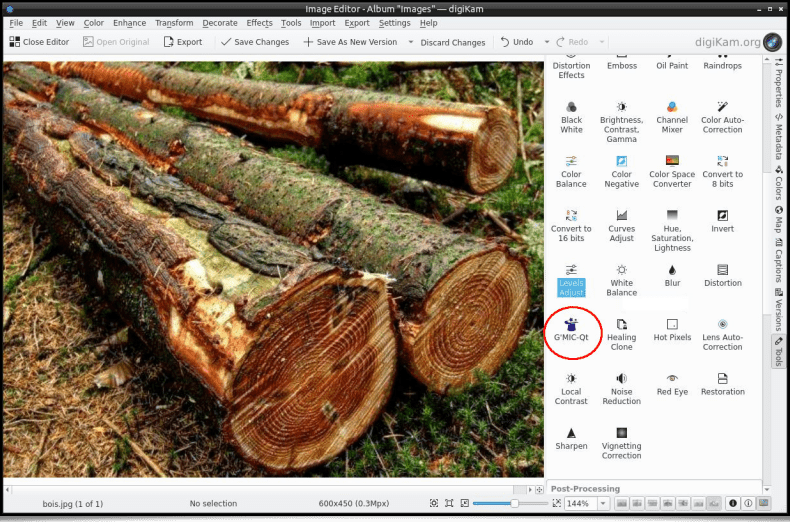 Fig. 5.1.2. The G’MIC-Qt plug-in is directly available inside Digikam, an open source photo management software.
5.2. Improvement of the stdgmic Standard Library
G’MIC's standard library (
stdgmic) contains the whole set of non native commands, directly written in the
G'MIC language, and by default provided with the framework. In practice, the vast majority of existing commands fall within this scheme. In addition to the new commands already described above, let's take note of the following inclusions and improvements in
stdgmic:
The
nn_lib library, allowing simple
neural network learning, acquired new modules (
Softmax Layer,
Cross-Entropy Loss,
Binary Cross-Entropy Loss,
Conv3D,
Maxpool3D and
PatchUp/PatchDown 2D/3D). Its development is progressing gradually. It is already used by the
Repair / Denoise filter,
already mentioned in our previous report. We have also implemented a few « toy » examples of statistical training using this library, such as the learning of a
(x,y) → (R,G,B) function depicting an image. Here, the idea is to train a neural network to reproduce a color image by providing, as learning data, the
(x,y) coordinates of the image's pixels (as input) and their corresponding
(R,G,B) colors (as output). The picture below shows the overall picture recosntructed by the network as learning iterations progress:
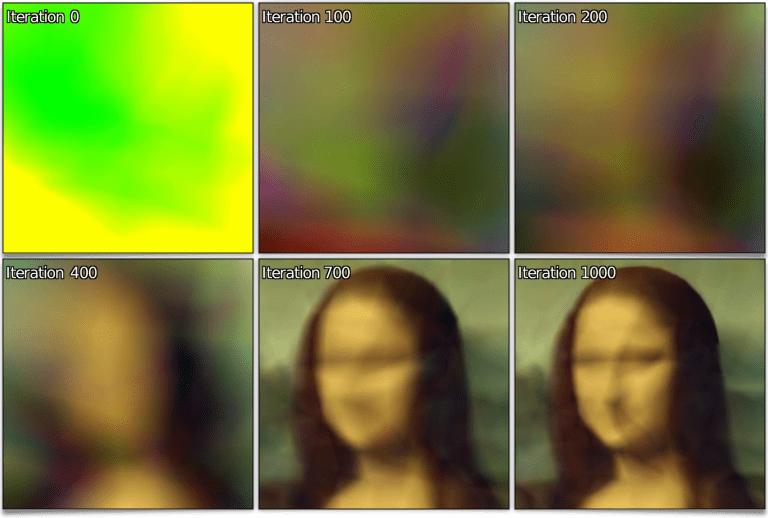 Fig. 5.2.1. Neural network training of a (x,y) → (R,G,B) function depicting an image. Different iterations of the learning process are shown.
The complete learning sequence can be viewed in the video below :
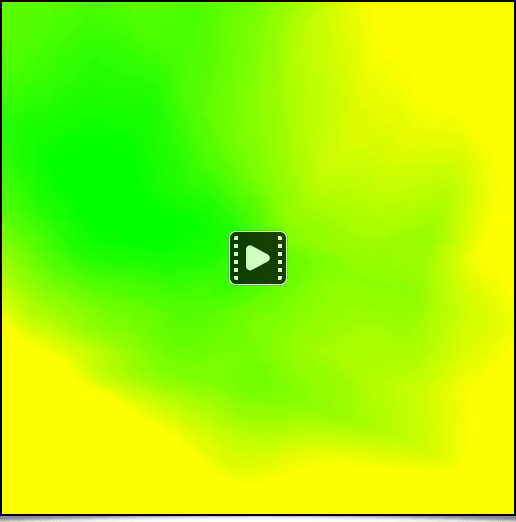 Fig. 5.2.2. Learning iterations sequence of the neural network for the training of a (x,y) → (R,G,B) function , representing an image.
We also have working examples of the
nn_lib to automaticaly classify simple images (from the
MNIST and
Fashion MNIST data sets, among others).
G’MIC is then potentially able to detect the content of some images, like illustrated below with the classification of handwritten digits (we have in store a smiliar method for detecting human faces).
 Fig. 5.2.3. Automatic classification of pictures of handwritten digits (MNIST database) by a neural network, using G'MIC's nn_lib library.
An incomplete documentation about using this statistical learning library with the
G'MIC language is available on
our discussion forum.
Another feature of `stdgmic: the
match icp command implements the algorithm called «
Iterative Closest Point » (
ICP ), which matches two sets of
N dimensional vectors. This command can be used to determine the rigid geometric transformation (rotation + translation) between two
frames of an animation, even in presence of noise. The animation below shows this process, with two rigid transformations estimated by
ICP, to respectively align the star and heart silhouettes.
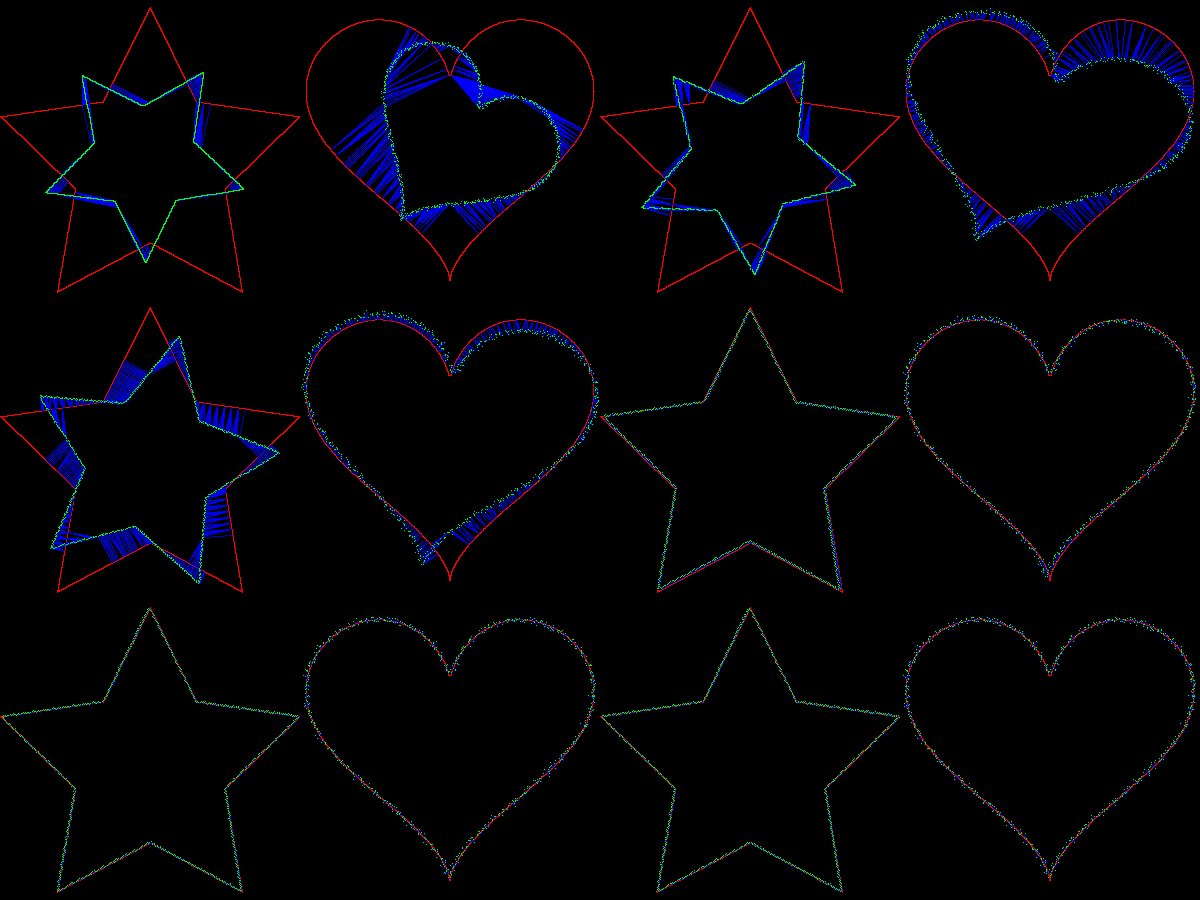 Fig. 5.2.4. Aligning silhouettes with the « Iterative Closest Point » algorithm, using the match_icp command.
they respectively allow decomposing and recomposing an image as a volumetric stack of thumbnails («
patches »), possibly taking into account overlapping
patches. For example, this command :
$ gmic butterfly.jpg img2patches 64
will transform the input image (below, left) into a volumetric stack of
patches (on the right ) :
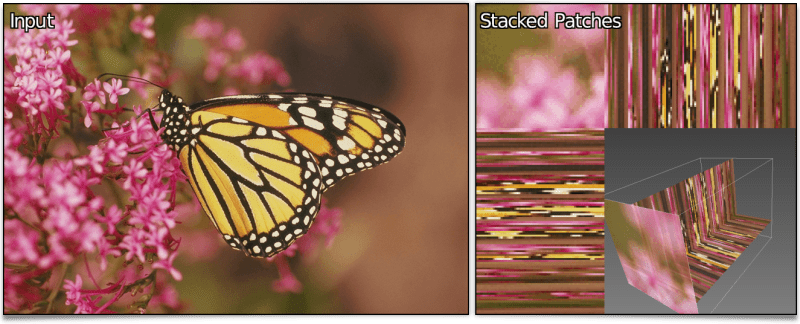 Fig. 5.2.5. Transforming a color image into a volumetric stack of patches, with the img2patches command.
This set of
patches can then be processed, for example by sorting them in increasing variance order (therefore from the level of detail they possess), before rebuilding the image. As shown with the following pipeline :
$ gmic sample butterfly W,H:=w,h img2patches 64,0,3 split z sort_list +,iv append z patches2img '$W,$H'
This creates the image below, where
patches are more and more detailed as you look down into the image.
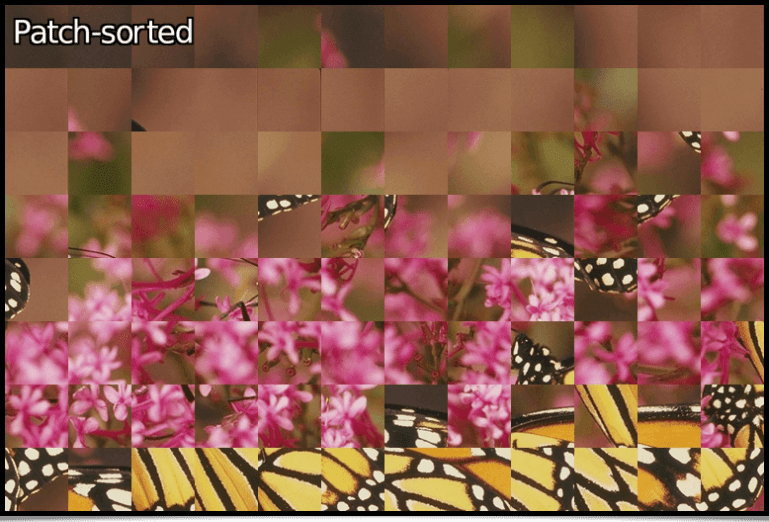 Fig. 5.2.6. Sorting patches of an image by increasing detail level.
The new
line_aa command implements
Xiaolin Wu's algorithm for tracing
anti-aliased line segments, which means it tries to reduce the aliasing effect which usually appears when tracing primitives in discrete images.
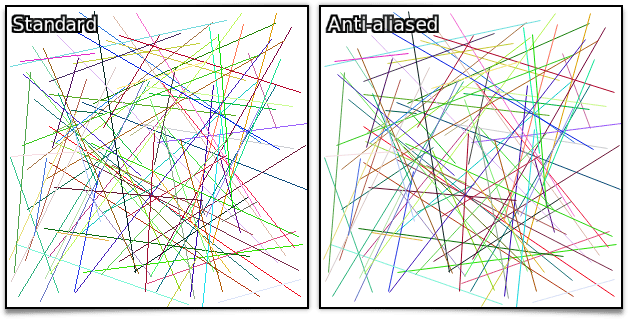 Fig. 5.2.7. Comparing traced line segments, between Brensenham's regular method and Xiaolin Wu's algorithm, implemented in the line_aa command.
As a conclusion to this section about
G’MIC's standard library, let's talk about the arrival of the
ssim (computation of the «
Structural Similarity » between two images),
opening,
opening_circ,
closing,
closing_circ (morphological opening and closing with a square of circular structural element),
betti (calculation of the
Betti_numbers, topological invariants of discretized shapes in 2D or 3D) and a new layer blending mode for the
blend command:
shapeprevalent. As you can see, there is always new things to delve into ☺!
5.3. Various Information Related to the Project
To conclude this long report, here is some general information on the
G’MIC project.
Firstly, a reminder about the existence of
OpenFX) plug-ins embedding
G’MIC's functionalities, therefore allowing the application of most of our filters from video editing software implementing this
API (such as
Natron) or
Adobe After Effects).
See the
dedicated post from the author of these plug-ins,
Tobias Fleischer.
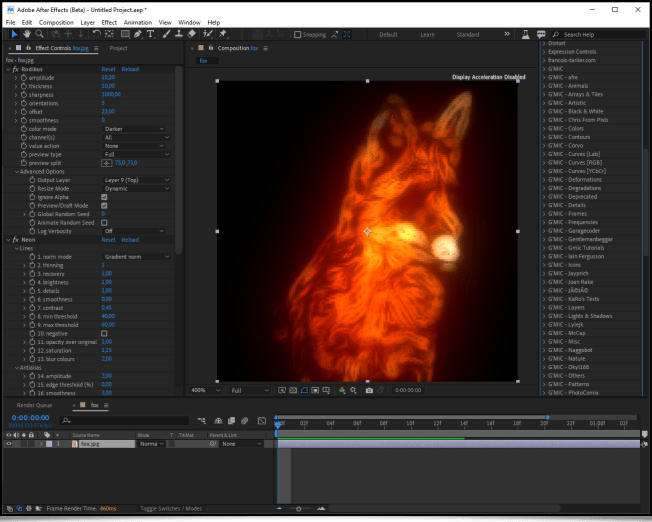 Fig. 5.3.1. One of G’MIC's OpenFX plug-ins in action, from within Adobe After Effects.
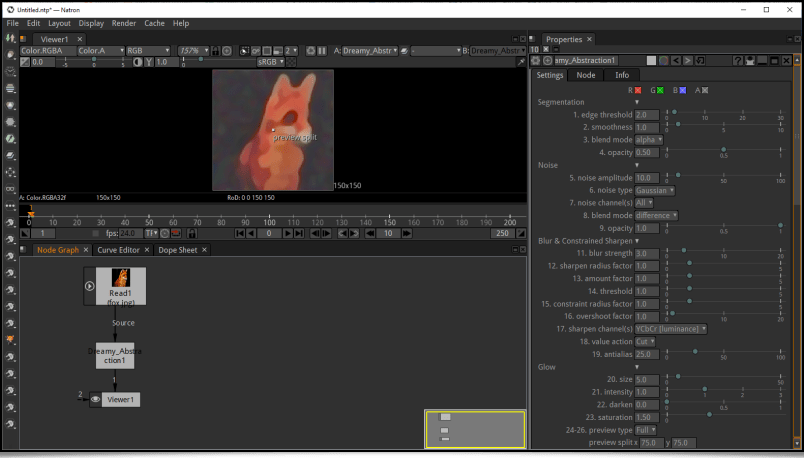 Fig. 5.3.2. One of G’MIC's OpenFX plug-ins in action, from within Natron.
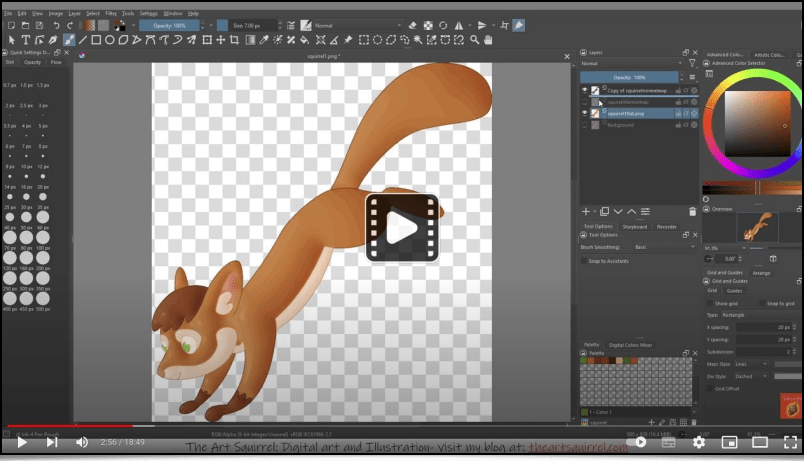 Fig. 5.3.3. Video tutorial on the use of the Illuminate 2D Shape filter to automaticaly illuminate a solid color drawing.
The more curious about the algorithm's technical details can view the following presentation, given to the
ICIP’2022 conference:
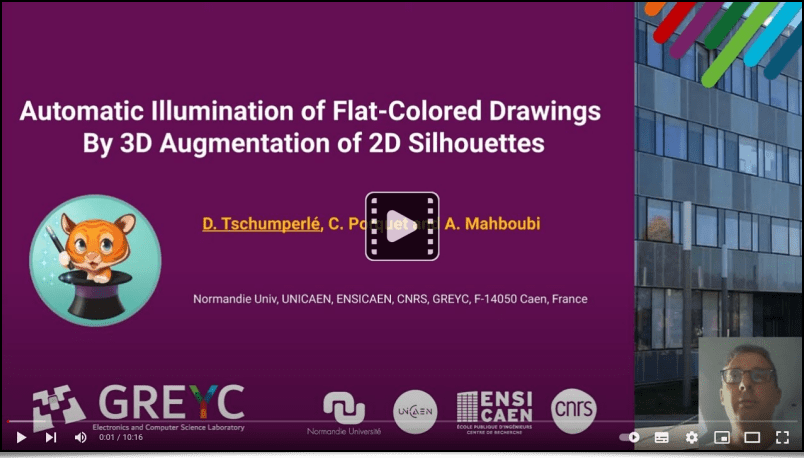 Fig. 5.3.4. Video explaining the algorithm behind the Illuminate 2D Shape filter.
Let's remark that
G’MIC's scripting language is flexible enough to not only be used to conceive image manipulation filters, but also to create
interactive demo viewers. At the
GREYC laboratory, it allowed us to develop two demo terminals around image processing. These viewers are exhibited on our stand during public events (for example at the
Fête de la Science, or the
Festival de l’Excellence Normande).
The first of these demo viewers can be observed by clicking on the picture below (presented by our colleague
Loïc Simon). It illustrates the matter of «
style transfer » between two images. It runs on a touch table.
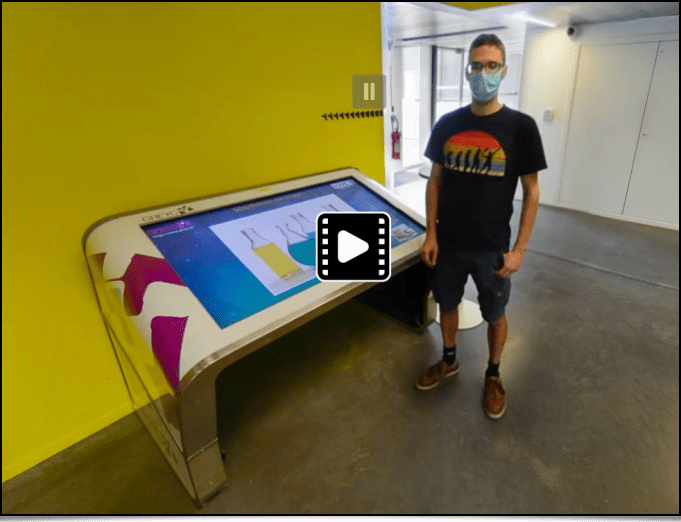 Fig. 5.3.5. Preview of G'MIC's style transfer demo viewer (click on the image to view the 360° demo).
The second one allows to play with an interactive distorting mirror, as shown in the video below:
 Fig. 5.3.6. Interactive image distortion demo viewer, implemented with the G’MIC language.
As a personal project, I've started to write a simple
raytracer with the
G’MIC language, to test it's capabilities. The goal isn't necessarily to go very far (because time is lacking, but it is very interesting in practice!), but it is a good way to uncover interesting optimizations which could be made to the
G’MIC interpreter in the future. A simple object animation, generated by this
raytracer under development, is shown below:
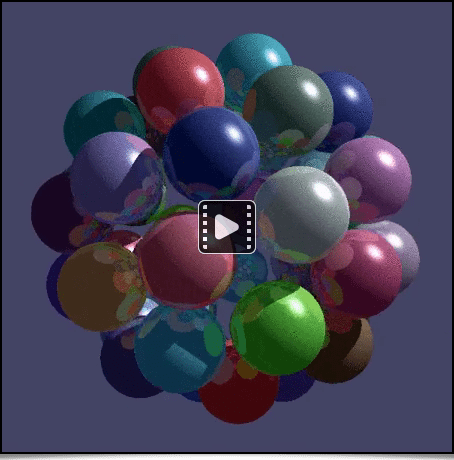 Fig. 5.3.7. Example of raytracing rendering, implemented in G'MIC language (under development).
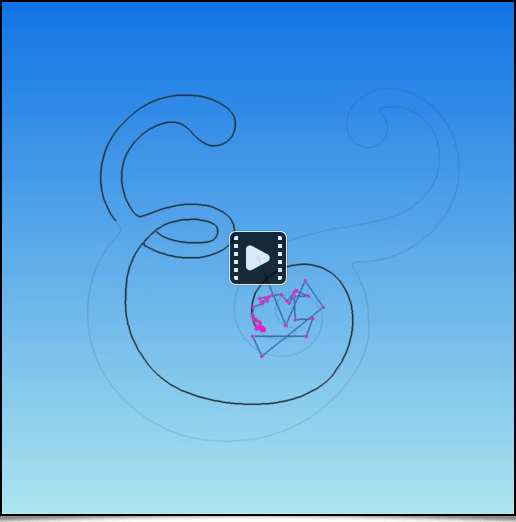 Fig. 5.3.8. Example of silhouette tracing using the arabesque method described in Garry Osgood tutorial.
Note that with
G'MIC's language, it is also possible to create funny
one-liners, which are pipelines fitting on a single line and generating peculiar images or animations. The two following pipelines are good examples:
: Generating a fixed color image (a flash of lights).
$ gmic 500,500 repeat 10 { +noise_poissondisk[0] '{3+$>}' } rm[0] a z f '!z?(R=cut(norm(x-w/2,y-h/2)/20,0,d-1);i(x,y,R)):0' slices 0 to_rgb f 'max(I)?u([255,255,255]):I' blur_radial 0.6% equalize n 0,255
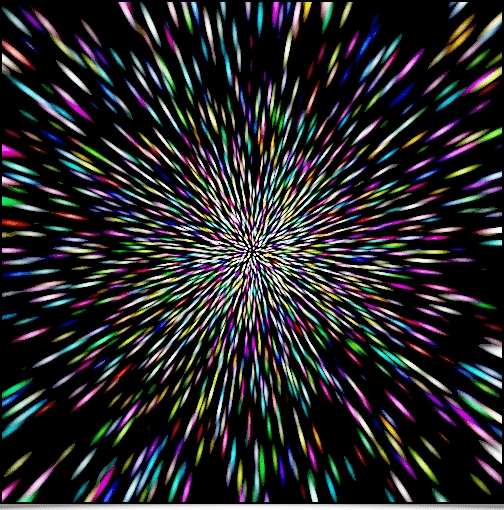 Fig.5.3.9. Results of the first one-liner.
One-liner N°2 : Creating a « dinosaur skin » color animation.
$ gmic 300,300x5 foreach { noise_poissondisk 40 +distance 1 label_fg.. 0 mul. -1 watershed.. . rm. g xy,1 a c norm neq 0 distance 1 apply_gamma 1.5 n 0,255 } morph 20,0.1 map copper +rv[^0] animate 40
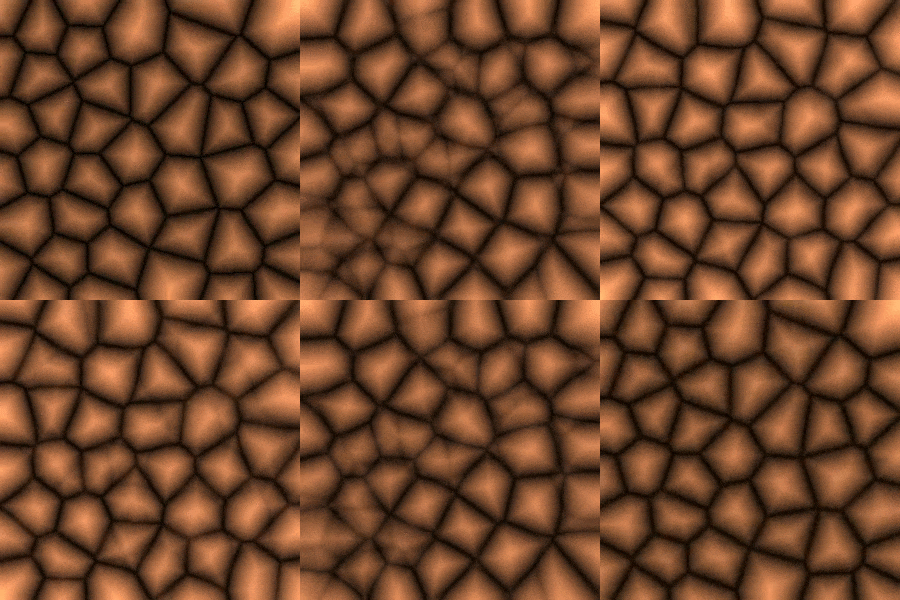 Fig.5.3.10. Results of the second one-liner.
The two pictures below result from experiments with the
G’MIC language made by
Reptorian, a long time contributor, who very much explores the language's generative art capabilities.
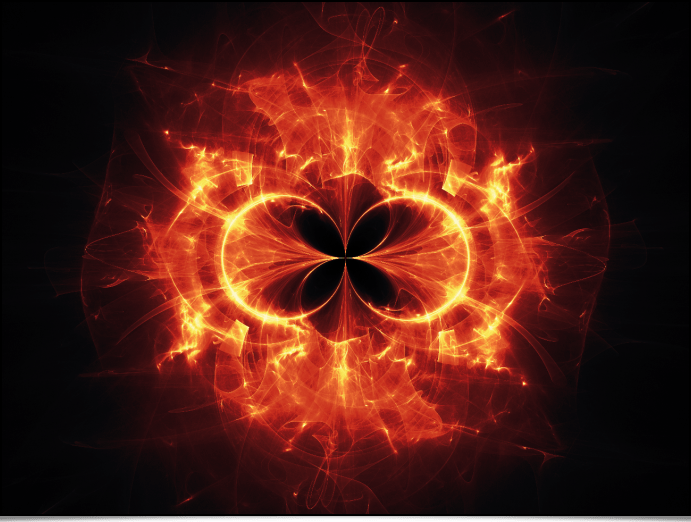 Fig.5.3.12. Generating a fractal pattern (by Reptorian).
Many other examples are available in
his forum thread.
Concerning the « communication » aspect of the project, a
Twitter account was created several years ago, where we regularly post news of the project's growth, new features implementation, new version releases, etc. From now on, we also have
a Mastodon_account, where we post news of the project. Do not hesitate to subscribe!
 Fig. 5.3.13. Preview of G’MIC's Mastodon account.
On social networks, we sometimes come accross unexpected posts of people showing their use of G’MIC. For example, this series of recent posts involves the processing of astronomical images with G’MIC filters, to remove denoise or artistically enhance pictures.
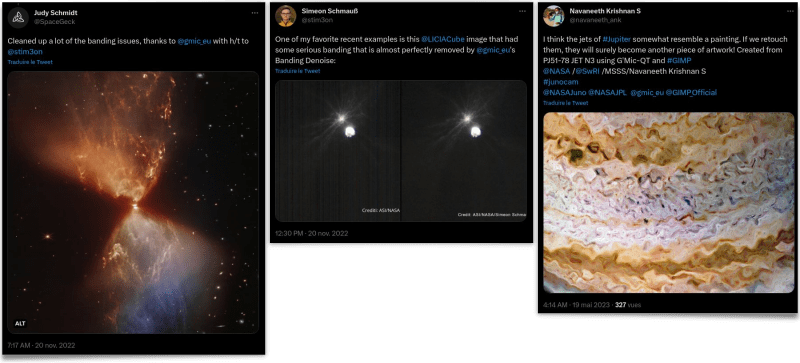 Fig. 5.3.14. Using G'MIC to process astronomical images.
You can find these
posts here,
there,
there, and
also there. This user feedback is obviously rewarding for us. If you are a (happy ☺)
G’MIC user yourself, do no hesitate to share your creations or your feedback. It's always a pleasure!
Finally, let's mention the fact that
G’MIC was the subject of articles written by
Karsten Gunther in issues number
301 and
302 of the
LinuxFormat magazine (published in may and june 2023). They present the different photo editing capabilities provided by the
G’MIC-Qt plugin in a very educational way (just like we tried to do in this report!).
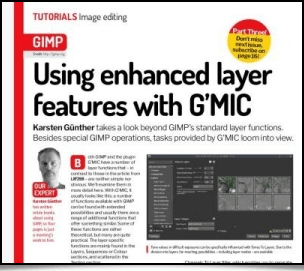 Fig. 5.3.15. The « Linux Format » magazine offer a series of articles on using G’MIC-Qt, in its may and june 2023 issues.
Here, this concludes our roundup of the
G’MIC project's latest developments and information.
6. Conclusions & Outlook
After
15 years of developing
G’MIC and
24 years of developing
CImg, the
C++ library which serves as its foundation, we now have a free and open source digital image manipulation framework, which is mature and has proven its usefulness in solving various image processing problems. Downloads keep on rising since writing the first lines of code (in 2008), proving that it is a dynamic project which attracts a wide range of users.
Will this dynamism continue? Of course we still have ideas to improve this framework. But at the same time, as professionnal duties increase, the time available for its development decreases. So going forward, the strategy will be:
To properly choose which improvement paths to work on.
To attempt to find external development time (either voluntary or funded).
On the short term, we are looking for contributors:
To push forward the development of
G’MIC's Python binding. It needs to be updated and devoted enough time to thoroughly test it, to make
G’MIC usable directly from a
Python program, without
bugs. Existing
binding is functional and is already a good working basis.
To succeed in
packaging G’MIC for
macOS. We indeed receive a lot of requests from
Mac users who don't know how to build and install the
G’MIC-Qt plug-in for
GIMP.
If you think you can contribute on one of these two subjects,
do not hesitate to contact us!
Finally, the revolution induced by the use of neural network in the field of digital image processing is fundamental. On this point,
G’MIC has some catching up to do. Until now, we mainly have focused on « standard » algorithmic image processing. Our
nn_lib library should be developped faster to be able to deploy larger neural networks (a few dozens/hundreds of millions of parameters would already be satisfying!), to allow image processing or synthesis using more advanced statistical learning.
As you can see, we are not lacking ideas!
To conclude, let's not forget that
G’MIC's development couldn't have happened witout the encouragement and support of
GREYC, our laboratory, and its guardianships: the
CNRS INS2I institute, the
University of Caen Normandie, and the
ENSICAEN. Huge thanks to them for the help on multiple levels during these last fifteen years of development. For some time, in the domain of scientific research, some interesting initiatives have been taking place in France to promote open and reproducible science (
national plan for open science,
CNRS open science plan, …), and open source software (
CNRS Open Innovation promoting program). These are encouraging signs for researchers who often invest a lot of time creating free digital commons (software, data sets, etc.), and sometimes have trouble promoting their work as significant scientific contributions.
We hope that you have enjoyed this report. See you in a few
months semesters, we hope, with once again a lot of new features to share with you all!


