| Table of Contents ▸ Installing the G'MIC-Qt Plug-in For 8bf Hosts | ◀ Help Writing Reference Documentation | Managing 3D Vector Objects ▶ |
Installing the G'MIC-Qt Plug-in For 8bf Hosts
by Nicholas HayesTable of Contents
General Instructions
System Requirements
Windows 7, 8 or 10.
A compatible 32-bit or 64-bit host application.
Installation
1. Download the 8bf version of the G'MIC-Qt plug-in from here, and unzip the file.2. Close your host application.
3. Place GmicPlugin.8bf and gmic folder in the folder that your host application searches for filter plug-ins.
4. Restart your host application.
5. The plug-in will now be available as the G'MIC-Qt menu item in the GMIC category.
Updating
Follow the installation instructions above and allow any existing files to be replaced. Installation for Photoshop
Default Plug-In Folder Location
The default location that plug-ins are installed to will depend on the version of Photoshop you have installed.Photoshop CC
Plug-ins are installed in a common folder that is shared between all Photoshop CC versions.C:\Program Files\Common Files\Adobe\Plug-ins\CC
If you have installed both the 64-bit and 32-bit versions of Photoshop CC, the 32-bit version will use the following common plugin folder:
C:\Program Files (x86)\Common Files\Adobe\Plug-ins\CC
Photoshop CS6 and earlier
Plug-ins are installed in a version-specific plugin folder.C:\Program Files\Adobe\Photoshop [version]\Plug-ins
If you have installed both the 64-bit and 32-bit versions of Photoshop CS4-CS6, the 32-bit version will use the following version-specific plugin folder:
C:\Program Files (x86)\Adobe\Photoshop [version]\Plug-ins
Installing the G'MIC 8bf Filter Plug-in
After unzipping the plug-in you will have a folder to at looks like the following: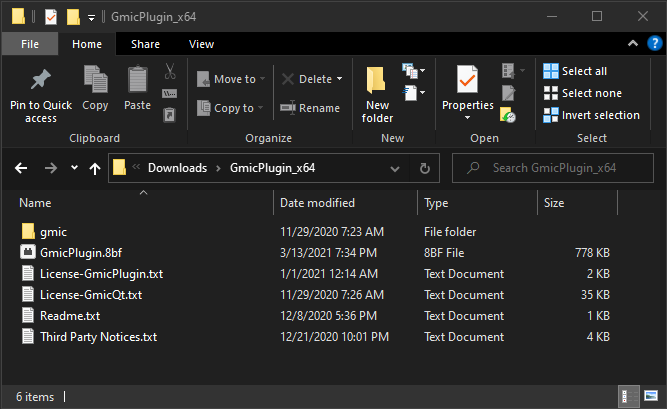
Select the GmicPlugin.8bf file and the gmic folder and copy it to your Photoshop plug-ins folder.
The following image shows how the Photoshop CC plug-ins folder should look after the plugin has been installed:
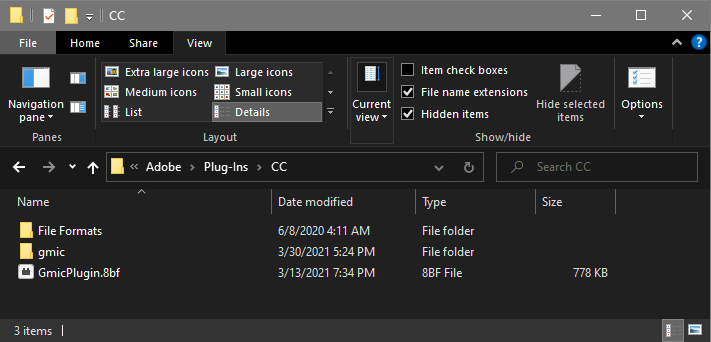
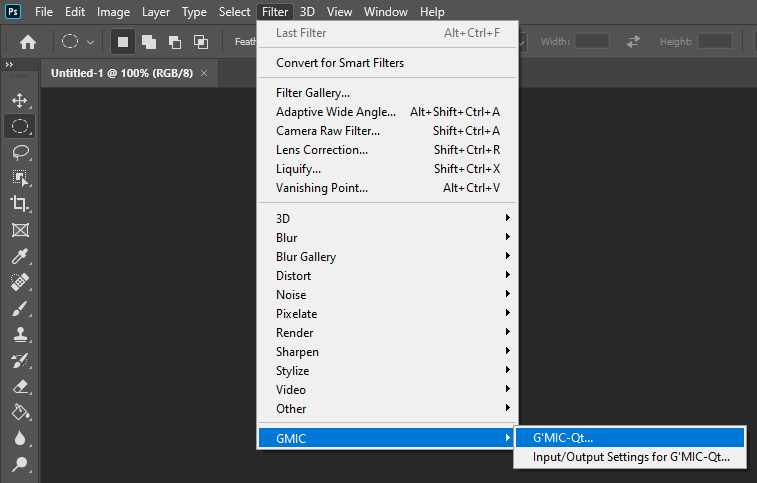
After installation the plug-in can be found as the G'MIC-Qt menu item in the GMIC category of the Filters menu.
 Installation for Affinity Photo
Start Affinity Photo, click the Preferences menu item in the Edit menu.
Select the Photoshop Plugins item, and then click the Open Default Folder in Explorer... button.
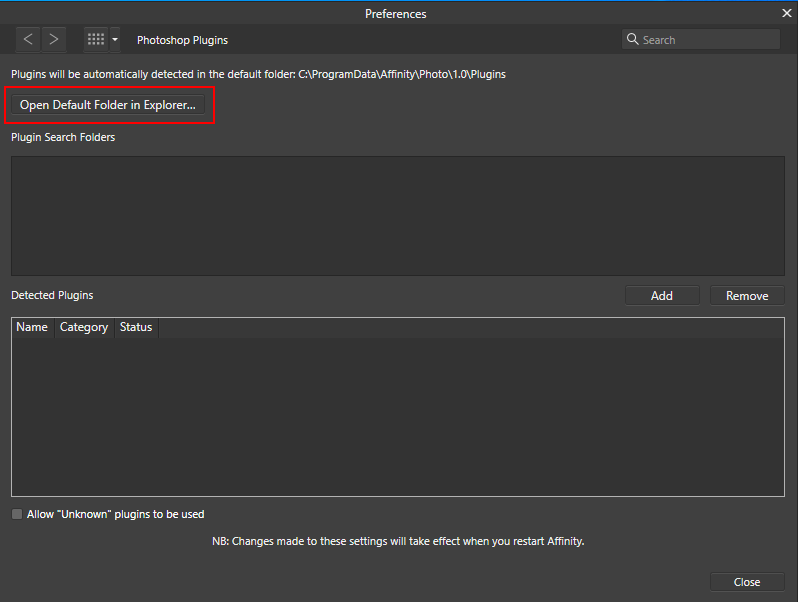
After unzipping the plugin you will have a folder to at looks like the following:

Select the GmicPlugin.8bf file and the gmic folder and copy it to the Affinity Photo default plugins folder.
The following image shows how the Affinity Photo default plugins folder should look after the plugin has been installed:
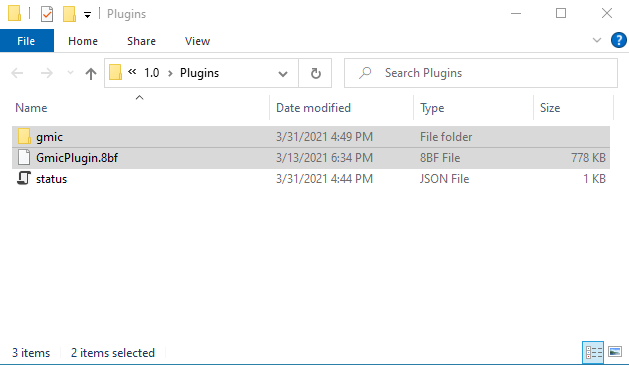
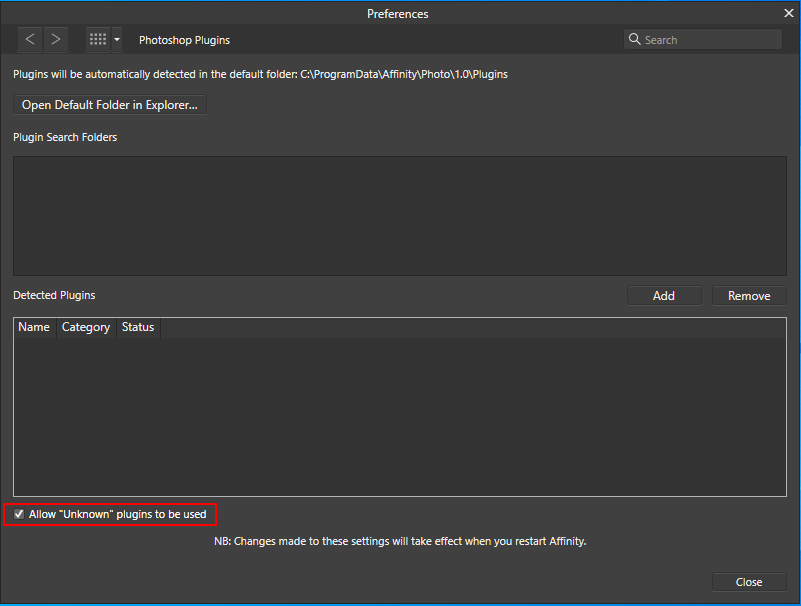
After placing the plug-in in Affinity Photo's default plugin folder you will need to ensure that the Allow "Unknown" plugins to be used check box is checked. By default, Affinity Photo will only load plugins that its developers have tested for compatibility.
After restarting Affinity Photo the plugin can be found at Filters > Plugins > GMIC > G'MIC-Qt....

 Installation for XnView
After unzipping the plug-in you will have a folder to at looks like the following:

Start XnView and open an image.
Open the Adobe Photoshop Plugin... menu item in the Image menu.
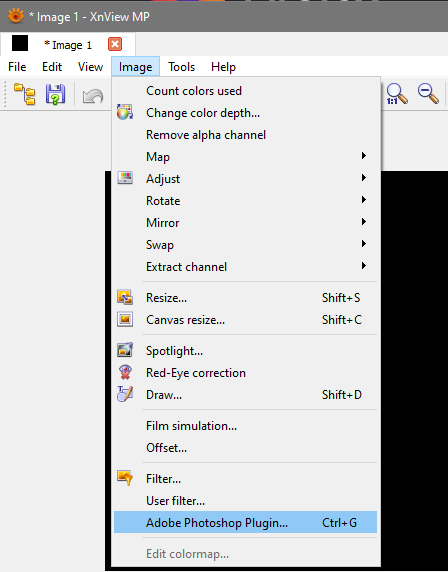
When the Adobe Photoshop Plugin... dialog opens click the Configure... button.
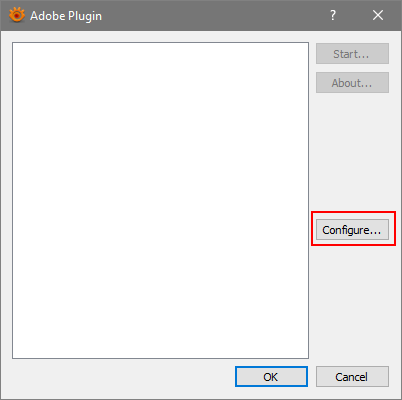
After the Configure Adobe Plugin dialog opens click the Add... button and select the folder that you have unzipped.
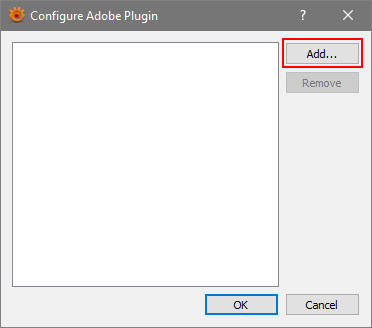
After selecting the plug-in folder location click OK to close the Configure Adobe Plugin dialog.
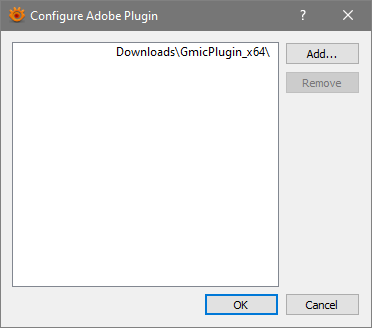
The plug-in can be found as the G'MIC-Qt menu item in the GMIC category.

Adobe and Photoshop are either registered trademarks or trademarks of Adobe Systems Incorporated in the United States and/or other countries.
Windows is a registered trademark of Microsoft Corporation in the United States and other countries.
All other trademarks are the property of their respective owners.


 Home
Home Download
 News
News Mastodon
 Bluesky
 X
X Summary - 17 Years
 Summary - 16 Years
 Summary - 15 Years
 Summary - 13 Years
 Summary - 11 Years
 Summary - 10 Years
 Resources
 Technical Reference
 Scripting Tutorial
 Video Tutorials
 Wiki Pages
 Image Gallery
 Color Presets
 Using libgmic
 G'MIC Online
 Community
 Discussion Forum (Pixls.us)
 GimpChat
 IRC
IRC Report Issue