G'MIC 3.6 : The Art of Polishing Your Images !
By David Tschumperlé.August 27, 2025
G'MIC, a free and open-source framework for digital image processing, has just released a significant update with the brand-new 3.6 version.
This is a great opportunity to give you an overview of what’s been happening around the project recently — in particular, the main changes since our previous announcement (for the 3.4 release), published a little over a year ago (June 2024).
N.B.: Click on the images to view them in full resolution, or to watch the corresponding video when you see the
1. G'MIC : A framework for processing digital images
G'MIC (GREYC's Magic for Image Computing) is a free and open-source project dedicated to the processing, manipulation, and creation of digital images. It is mainly developed within the IMAGE research team at the GREYC laboratory in Caen, France (a joint research unit UMR supported by CNRS, ENSICAEN and the University of Caen).At the core of the project lies a dedicated script interpreter, the G'MIC language, designed to make it easy to prototype and implement new image processing algorithms. Around this core, several user interfaces have been built, providing access to hundreds of built-in image operators and filters while also allowing users to design and share their own custom processing pipelines. G'MIC is, by essence, an open and extensible framework.
Among its most popular variants are: gmic, a command-line tool comparable (and complementary) to ImageMagick or GraphicsMagick; the online service G'MIC Online; and most importantly, the G'MIC-Qt plugin, which can be integrated into many popular image editing and creation tools such as GIMP, Krita, DigiKam, Paint.NET, Adobe Photoshop, or Affinity Photo. This plugin is by far the most widely used interface to G'MIC, providing fast access to more than 640 different filters, dramatically expanding the range of effects and transformations available in these image editing softwares.
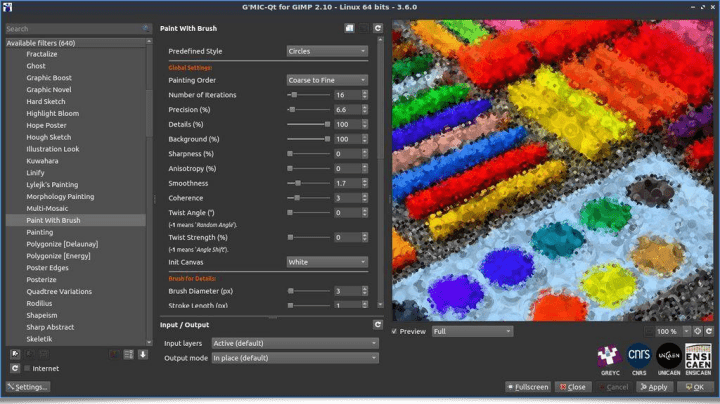
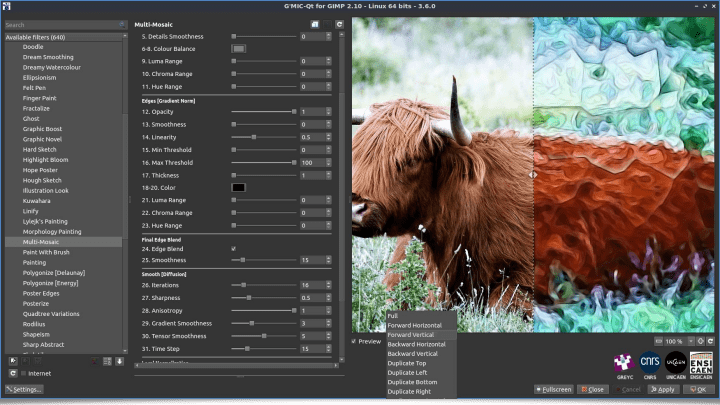
Fig. 1.1. The G'MIC-Qt plugin in version 3.6, here used inside GIMP 2.10 with the “Paint With Brush” filter activated.
2. What’s New in the G'MIC-Qt Plugin
2.1. Tribute to Sébastien Fourey, developer of G'MIC-Qt
Before we dive into the list of new features in version 3.6, we would first like to pay tribute to our colleague and friend, Sébastien Fourey. Sébastien was an Associate Professor at ENSICAEN and the main developer behind the G'MIC-Qt plugin. On October 6th, 2024, Sébastien passed away.Everyone who knew him will tell you the same: Sébastien was, above all, a profoundly humane and generous person, always attentive to those around him. He was as discreet and modest as he was talented with a keyboard in hand (and he was very discreet indeed!).
Even though he never sought the spotlight, we want to make an exception here and shine a light on his invaluable work and the crucial role he played in the development of G'MIC. Thanks to him, G'MIC-Qt has become a plugin used and appreciated by thousands of people around the world.
Sébastien is deeply missed. We will do our best to ensure that his work lives on. Rest in peace, Sébastien — our thoughts go to you and to your family.
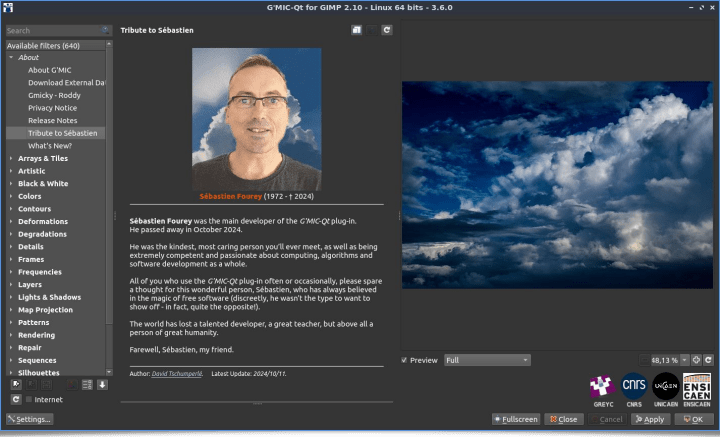
Fig. 2.1. Tribute to Sébastien Fourey, author of G'MIC-Qt, as shown in the “About” section of the plugin.
2.2. General Improvements to the Plugin
As you can imagine, development specifically focused on G'MIC-Qt has been on hold since last October. Nevertheless, the last contributions made to the plugin code have enabled the following improvements:The source code is now compatible with the new plugin API of latest GIMP’s major release (3.0). This made it possible to provide GIMP users with a fully functional G'MIC-Qt plugin right from the release of GIMP 3. Not many plugins were updated in time for this milestone (the popular Resynthesizer plugin being another exception). Our warm thanks go to Nils Philippsen and Daniel Berrangé, who submitted the patches enabling this compatibility with GIMP 3. At the same time, we continue to maintain support for the older (2.10) version of GIMP, which remains widely used.
The G'MIC-Qt codebase is also now compatible with the API of the Qt6 library, the latest major version of this graphical toolkit.
The plugin interface now features a native split-view preview tool for filters. This functionality, accessible via the keyboard shortcut CTRL + SHIFT + P, allows you to directly compare the image before and after applying a filter, by displaying both versions side by side in the preview window. This feature already existed, but it is now much smoother to use: previously, it was implemented separately for each filter, treating the preview splitter as just another filter parameter — which meant that even moving the splitter required a full recomputation of the filter result.
The following video demonstrates how this improved feature looks and behaves in the plugin:
2.3. New Image Filters
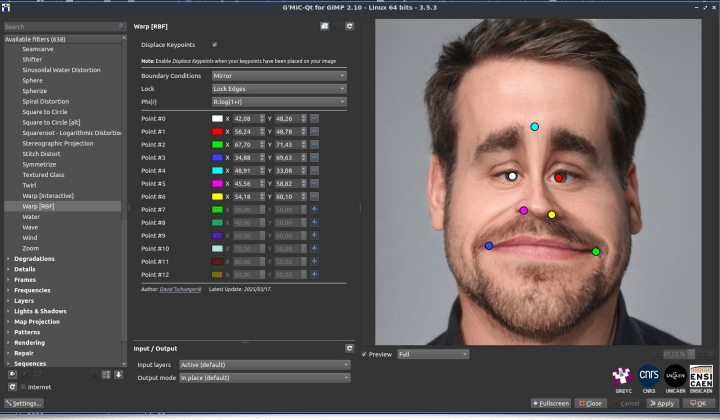
The main highlights of the G'MIC-Qt plugin in this release come in the form of new filters and effects available to users. With version 3.6, the plugin now offers access to no less than 640 different filters and effects. Here are some of the most recent additions:The Deformations / Warp [RBF] filter lets you locally warp an image by first placing anchor points directly in the preview window. Then, by moving these control points around, the image is distorted in an intuitive and interactive way, right inside the preview. Perfect for quick retouching or for creating fun caricatures!
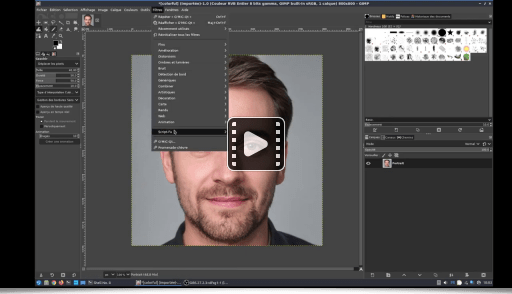
The following video shows the filter being used within G'MIC-Qt to warp a portrait:
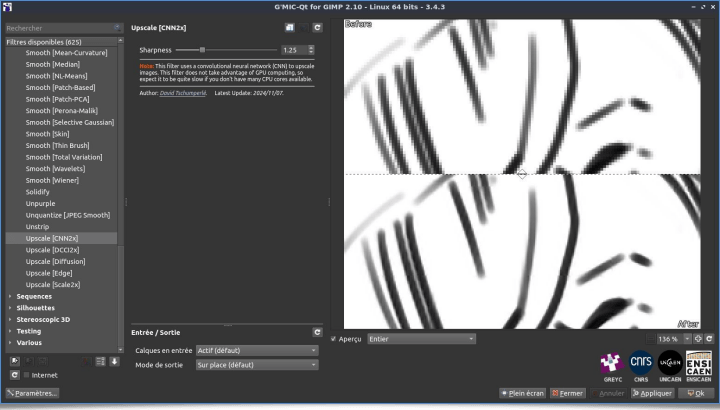
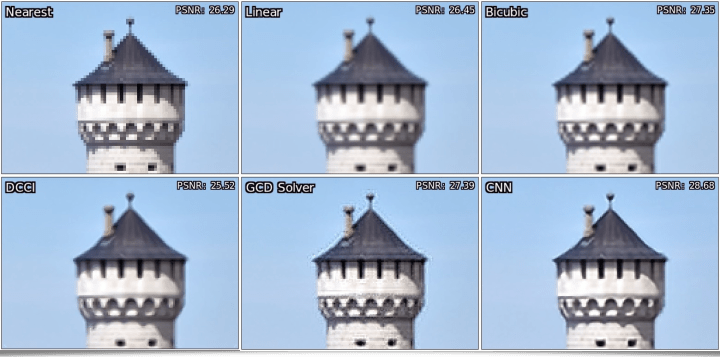
The Repair / Upscale [CNN2x] filter doubles the resolution of an image using a lightweight convolutional neural network (CNN), trained to best preserve details and textures during upscaling. This module provides a simple and relatively effective alternative to more traditional upscaling methods (particularly those natively available in GIMP).
The next figure compares classic upscaling methods with this new algorithm available in G'MIC-Qt (result shown at bottom right):
This filter also illustrates several recent improvements to nn_lib, the small internal machine-learning library integrated into G'MIC. Gradient clipping, L2 weight regularization, a Cosine Annealing LR learning-rate scheduler, a Pixel Shuffling module… these are some of the new features that have been added. While this neural network library is not particularly powerful (it only runs on CPU, not GPU), it still makes it possible to design interesting filters based on deep learning techniques.
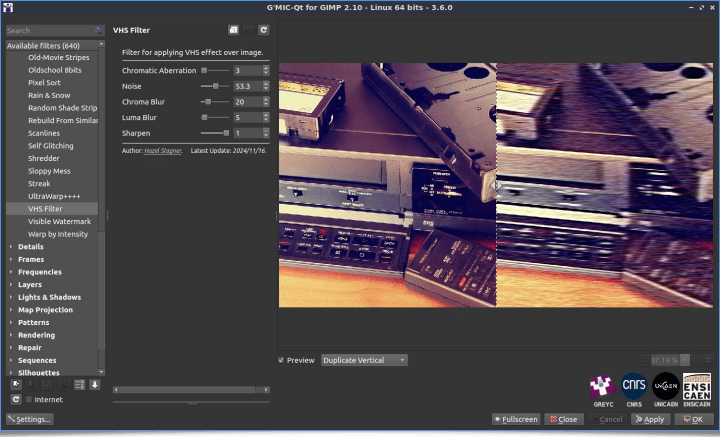
The Degradations / VHS Filter, created by Hazel Stagner, aims to recreate the distinctive look of old VHS tapes: subtle distortions, color noise, scanlines, and degraded saturation. A perfect way to give images a retro touch, reminiscent of analog videos from the 80s and 90s.
Since this filter generates random noise, applying it multiple times to the same image always produces a different result. This makes it especially fun for creating small “analog 90s-style” animations. Fans of Glitch Art will definitely appreciate it! (see the original image for comparison).
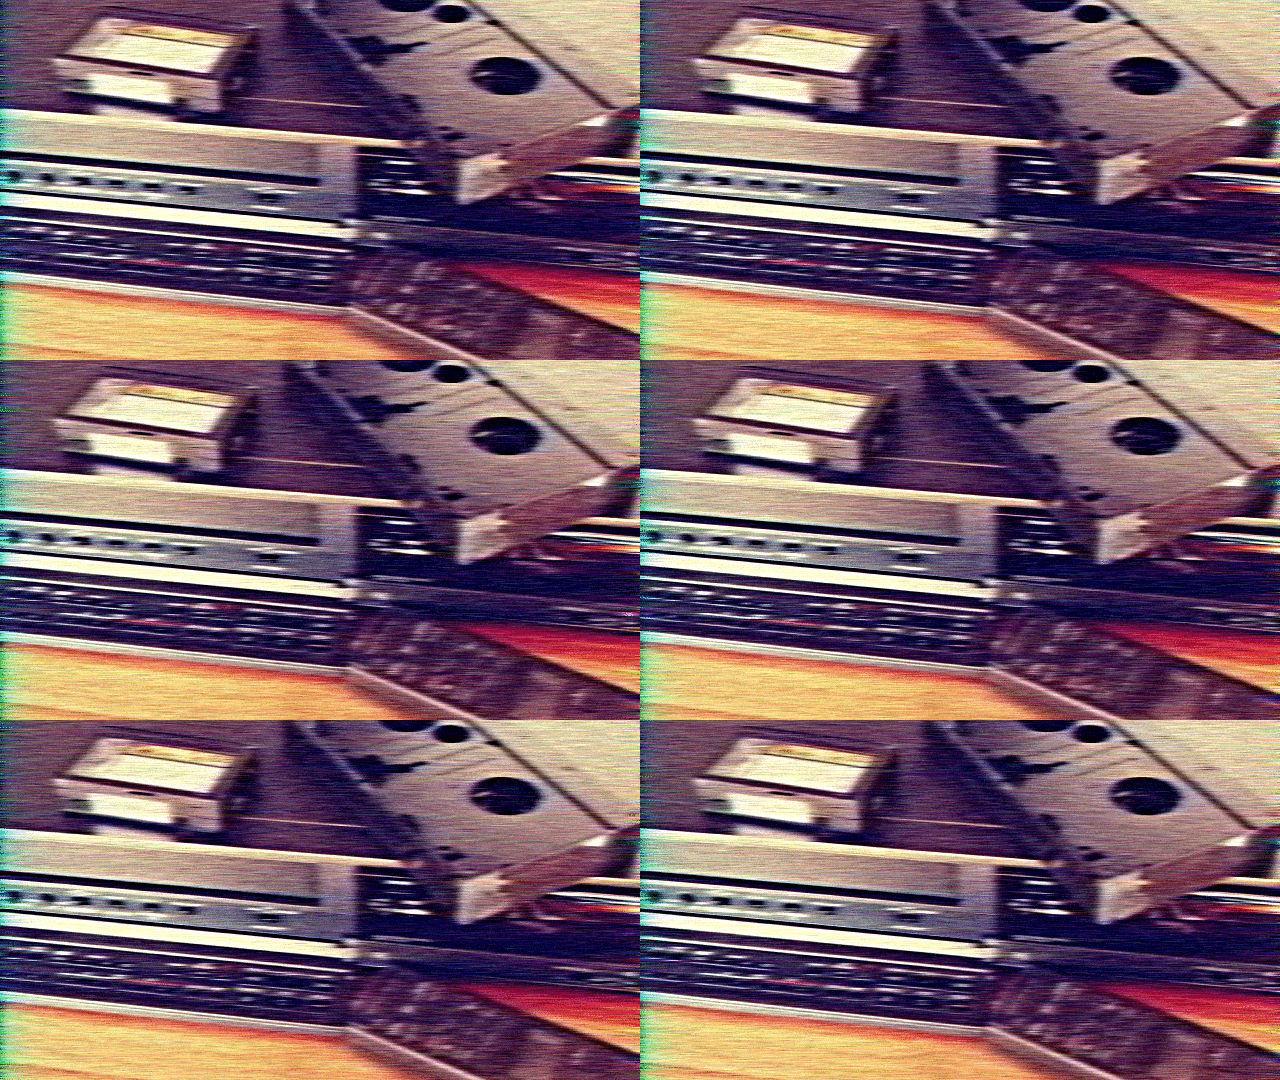
Fig. 2.3.6. The Degradations / VHS Filter applied several times on the same image, creating a VHS-style animation.
2.4. New Rendering Effects
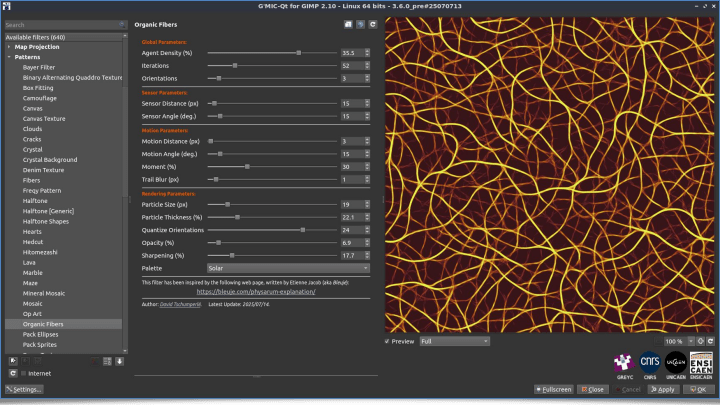
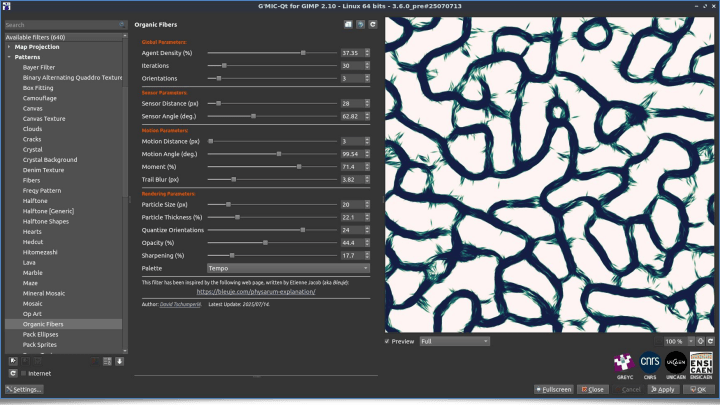
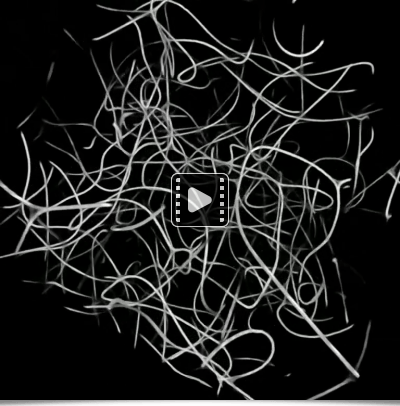
Some new effects have also been added to the plugin, not to modify an existing image, but to generate entirely new images or patterns from scratch:The Patterns / Organic Fibers filter synthesizes textures that look like interwoven organic fibers, based on the simulation algorithm of Physarum polycephalum proposed by Jeff Jones in 2010, and beautifully explained on this page by Etienne Jacob (definitely worth a look!). We’ll revisit this algorithm later in the article (section 4.2).
The Rendering / Speech Bubble filter inserts a comic-style speech bubble on an additional image layer, with customizable features such as the bubble’s roundness or the shape of its “tail,” thanks to various control points. It’s a quick way to integrate typical comic book elements into any image, as shown below: first the filter’s preview in the plugin, then the final result in GIMP after adding some text inside the bubble.
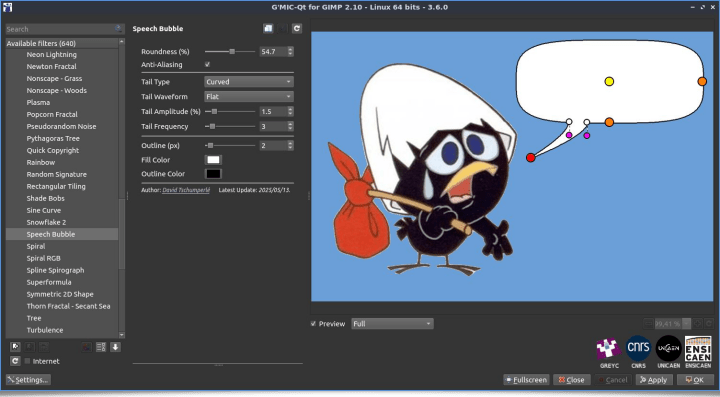
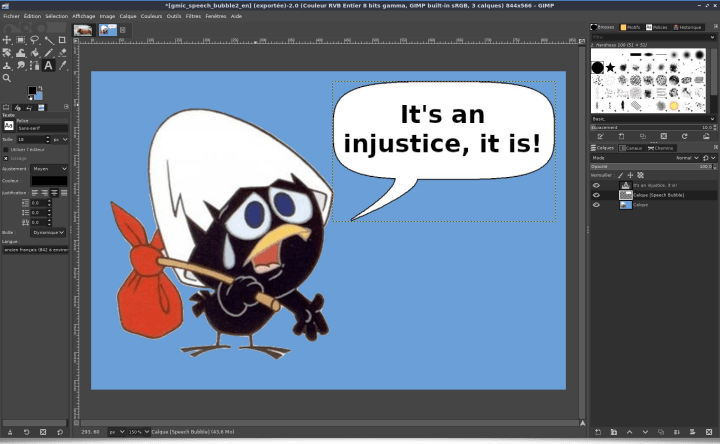
Fig. 2.4.2. The Rendering / Speech Bubble filter adds customizable comic-style bubbles to your images.
The following video shows the filter in action on a photograph:
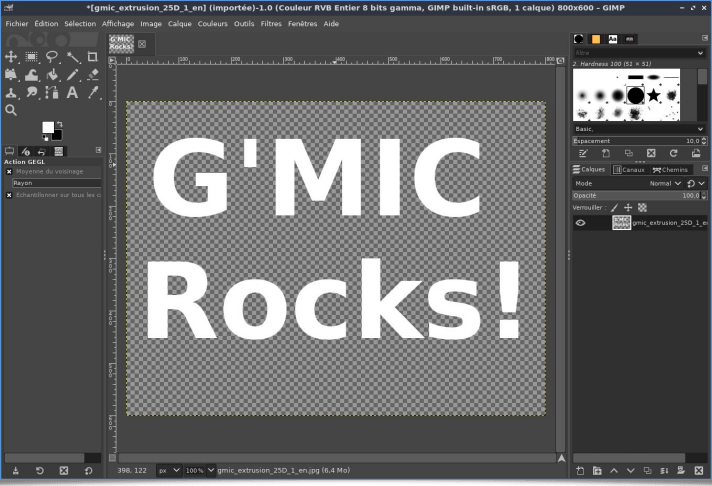
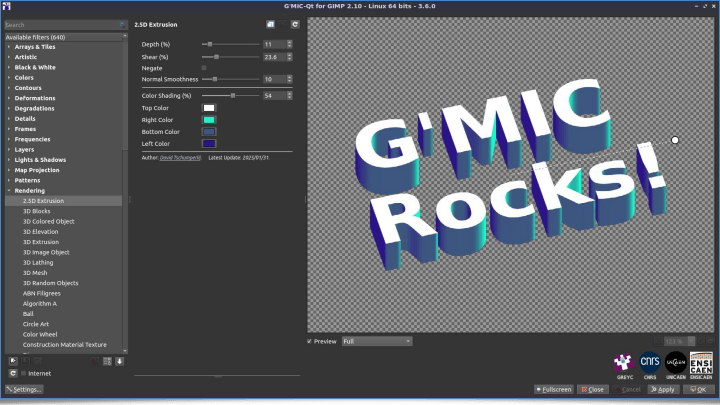
The Rendering / 2.5D Extrusion filter simulates a fake 3D extrusion effect from a binary input shape. It can quickly transform silhouettes or masks into more visually consistent objects with a sense of depth—without needing a dedicated 3D modeling program. The examples below show how it works: start by creating an opaque shape on a transparent background (here, some text), then apply the filter to produce a 3D-like extruded look. Rotation angle, extrusion depth, perspective strength, and face colors are all adjustable.
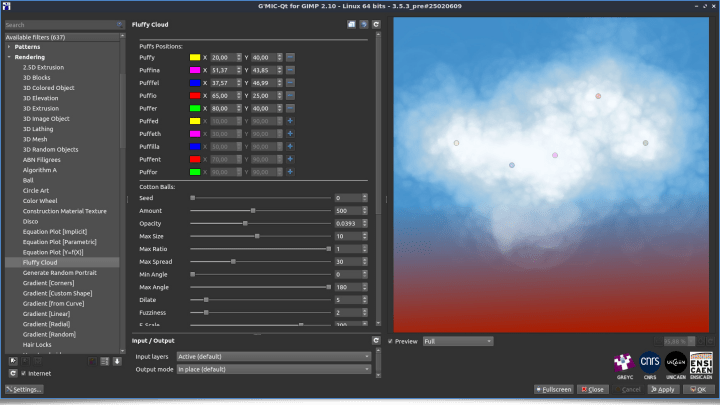
The Rendering / Fluffy Cloud filter automatically generates fluffy, cotton-like clouds inside your images. Perfect for creating synthetic skies, fog, vapor effects, and more. This filter was contributed by Prawnsushi, a regular G'MIC filter contributor whose work was also featured in our previous article. Here’s how the filter looks when first opened:
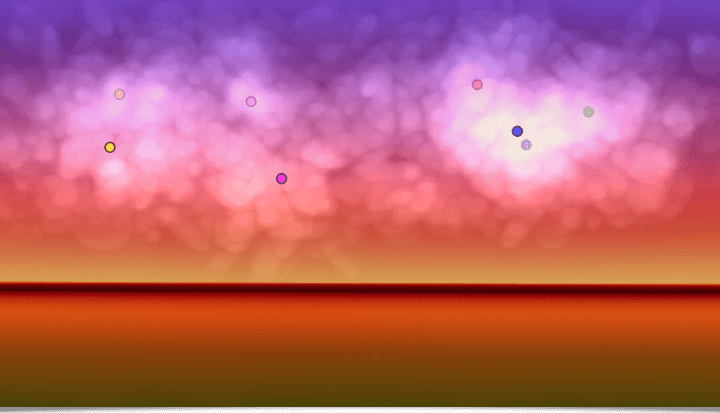
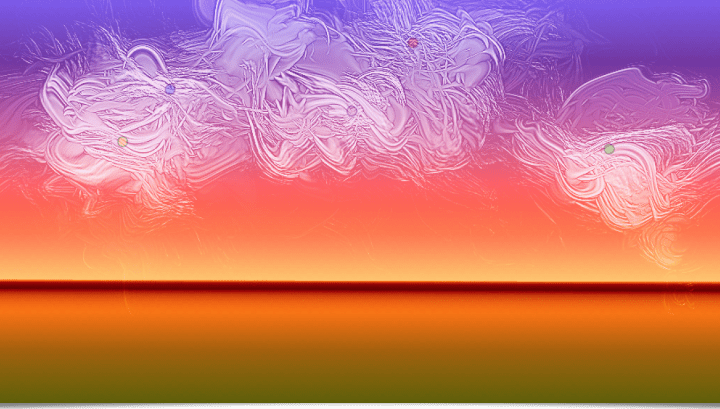
By tweaking the parameters, you can generate a wide variety of interesting results:
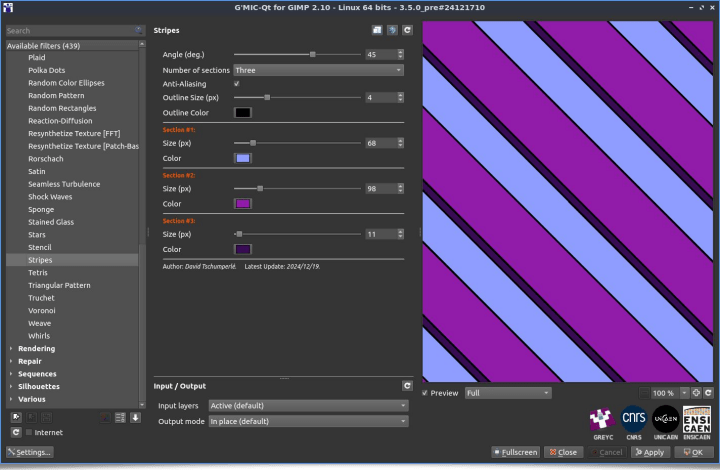
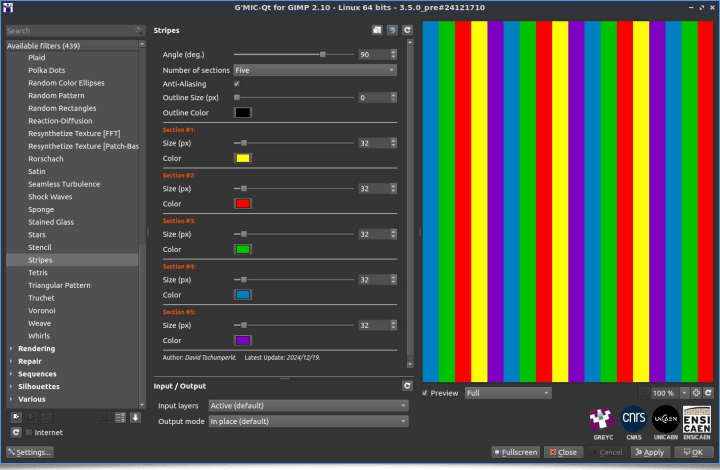
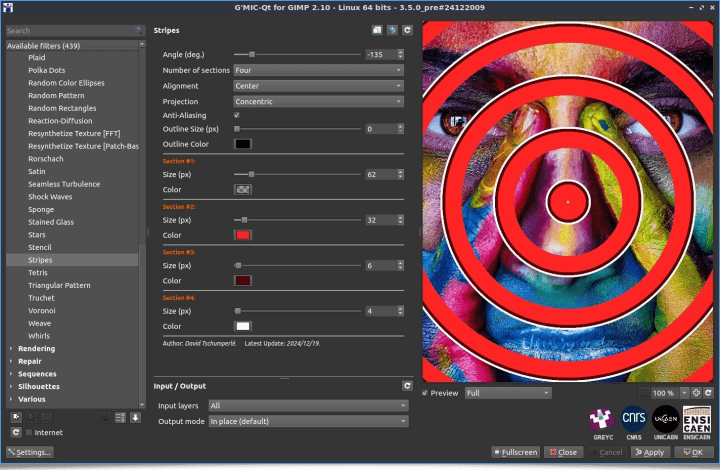
The Patterns / Stripes filter makes it easy to generate striped patterns, whether simple or complex. It provides many parameters to adjust the geometry of the synthesized patterns: type of stripes (linear, radial, concentric), size, color, and even the opacity of each stripe individually.
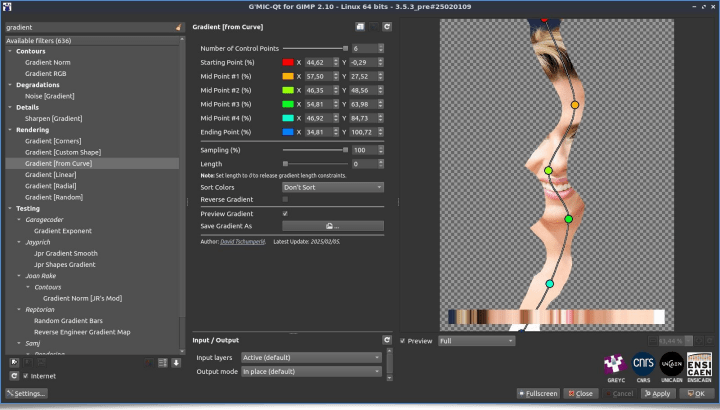
The Patterns / Gradient [from Curve] filter is not entirely new, but rather an upgrade of the previous Patterns / Gradient [from Line]. This enhanced version extracts a color gradient from an image along a path, not just a straight line but a piecewise cubic spline defined with up to 6 control points. This makes it possible to follow very curved structures within images, as shown in the example below:
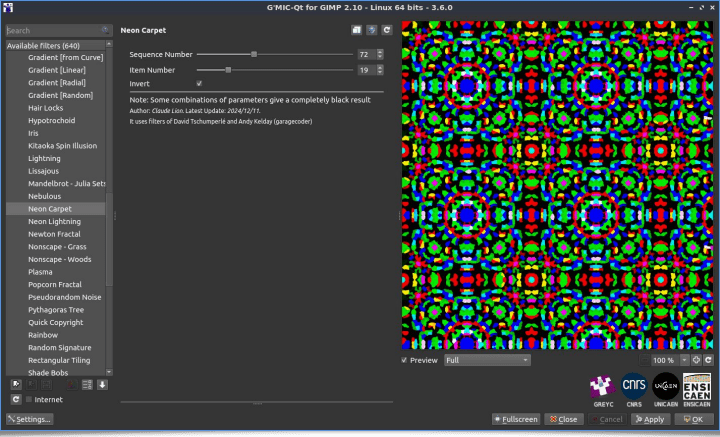
Finally, we should mention the Rendering / Neon Carpet filter, an original contribution by Claude (aka Cli345), a frequent G'MIC contributor. This psychedelic filter generates colorful, glowing patterns reminiscent of fluorescent carpets, as shown below:
That wraps up the main new features specific to the G'MIC-Qt plugin.
3. Improvements to the Core Engine and Standard Library
Let’s now turn to the work done this year to improve the core of the project—namely the G'MIC interpreter and its standard library of operators. These enhancements are a bit less visible to end users, but they are just as important: they consolidate the foundations of the software and open the door to new filters in the future.3.1. Interpreter Optimization
The internal engine of G'MIC has received a series of notable optimizations. Several internal tweaks—such as better string analysis, detection and concatenation, or faster min/max searches in large images (now parallelized with OpenMP) — have resulted in a modest performance boost (around 2.5% faster on average when running G'MIC scripts). It’s not a jaw-dropping speedup, but we’ll take it! (After 17 years of coding this interpreter, getting a huge gain would have been almost suspicious anyway 😊).On Windows, the interpreter now compiles with Clang and its associated libc, producing slightly more optimized executables.
3.2. 3D Rendering Engine Improvements
The built-in 3D rendering engine has also been improved with the addition of z-clipping for out-of-bounds primitives, better lighting calculations, corrected 3D normal rendering in Phong shading mode, and fine-tuned parameters for specular reflections.A new command, multithreaded3d (shortcut: mt3d), now lets you enable or disable multi-threaded 3D rendering (again via OpenMP). This significantly speeds up the rendering of large meshes.
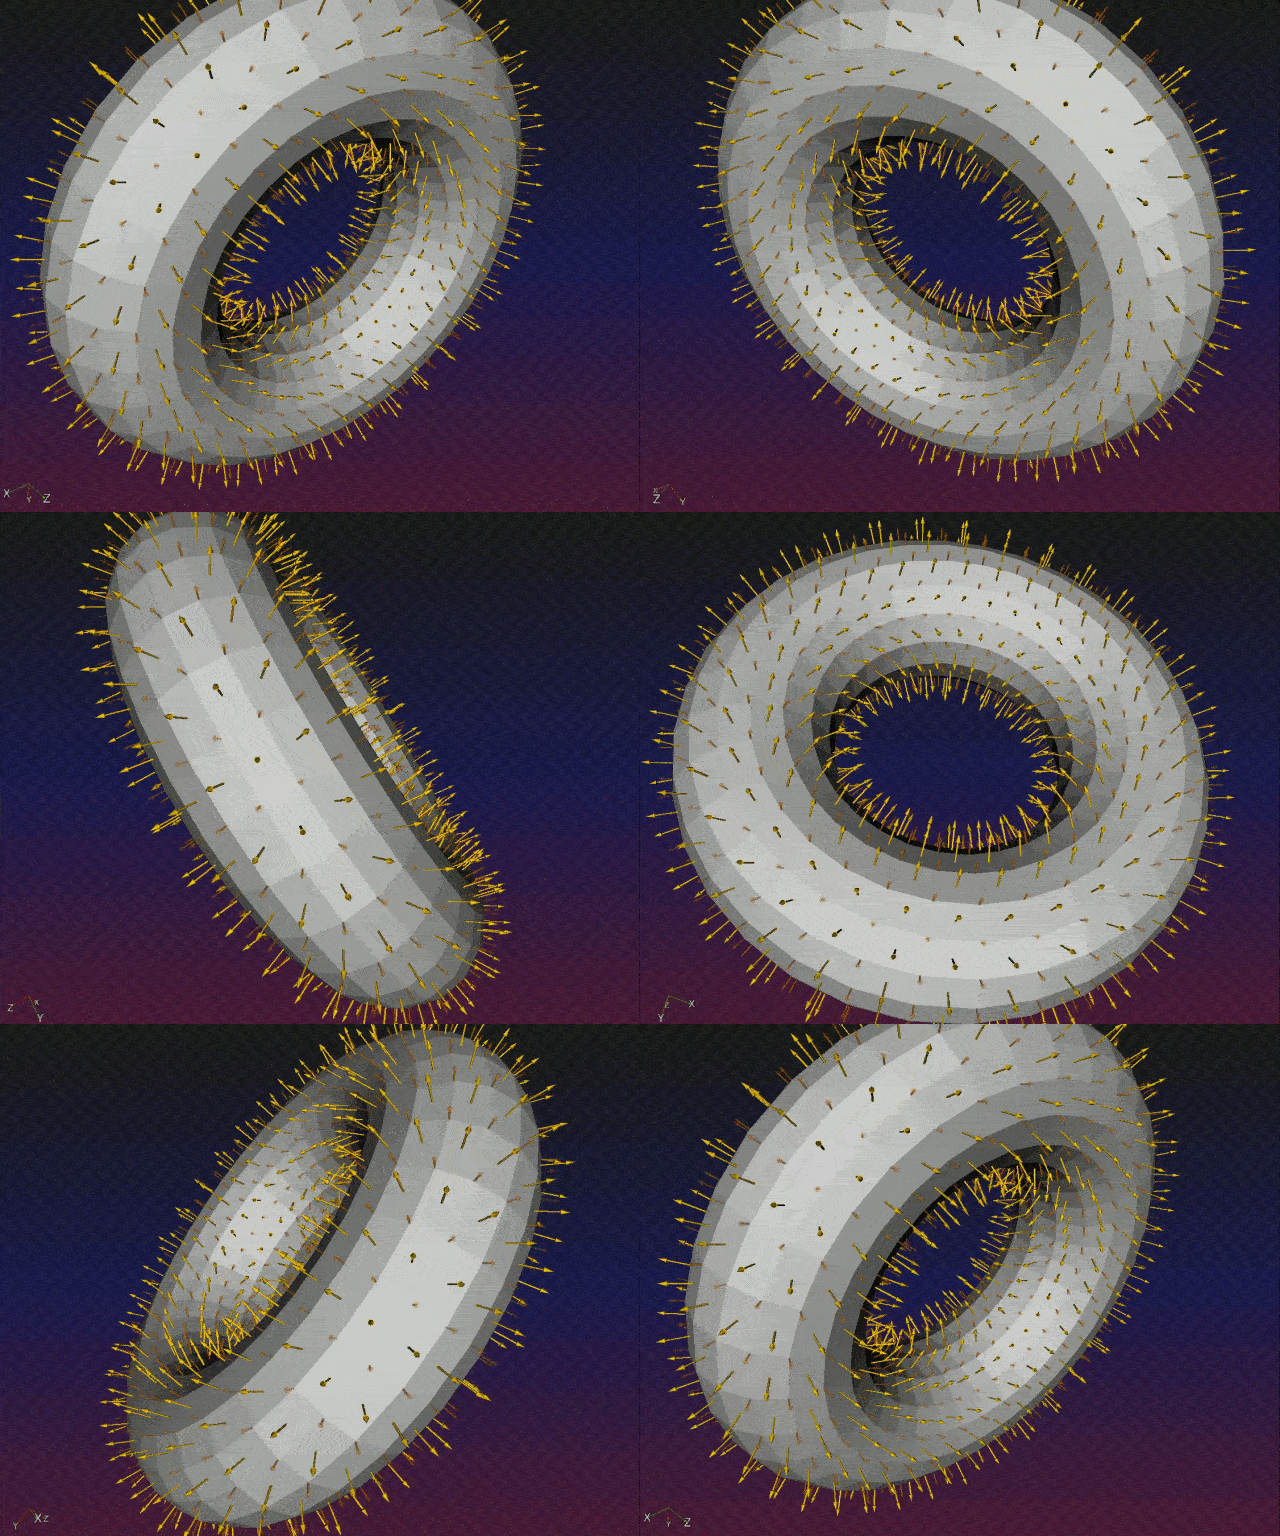
We should also mention the new normals3d command in the standard library, which estimates unit normal vectors of a 3D mesh—either at the vertices or at the primitives. The figure below shows an example of this command in action, visualizing normals on the surface of a 3D torus:
3.3. Improvements to the Math Expression Evaluator
The built-in math expression evaluator is one of the cornerstones of G'MIC (after all, image processing usually means lots of math!). It, too, has become more efficient and feature-rich.Without going too deep into technicalities, syntax parsing has been optimized by adding a preliminary pass to detect certain operators, speeding up the overall process. Several new functions have been introduced, such as epoch() to convert a date into Unix time, frac() to extract the fractional part of a number, and wave(), which generates different periodic functions (sinusoidal, triangular, etc.). See the examples below:
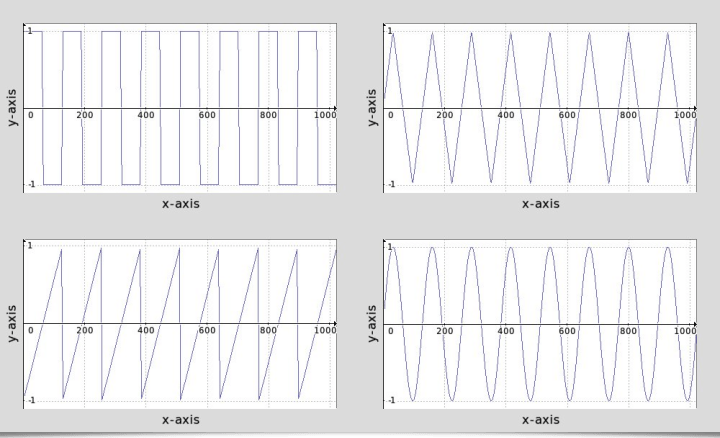

Fig. 3.3.1. The new waves() function makes it easy to generate waveforms, which are quite frequent (pun intended, signal processors!) in image operators.
3.4. Input/Output Improvements
Some nice improvements have also been made to input/output management:The TIFF format now saves large images (e.g., volumetric medical scans) faster. A wider choice of output compression modes is also available.
G'MIC now natively supports reading and writing WebP files (enabled by default in our Linux binaries).
Finally, work has begun on porting the display code to the SDL3 library. This should eventually improve compatibility with the native display systems of various Linux distributions (especially those running Wayland).
3.5. Sprite Packing
One of the more significant additions to the G'MIC standard library is the complete rewrite of the pack_sprites command, which implements a “packing problem” algorithm. In short, this type of algorithm arranges small disjoint sprites inside a binary mask of arbitrary shape, producing complex composite visuals.The new implementation is both faster and smarter (thanks to better placement heuristics), optimizing the layout of sprites while reducing generation time. And since a picture is worth a thousand words, here are a few fun examples of what this algorithm can do:
Sprites to be packed can have any shape—for instance, individual letters (top image above), full words (bottom), or anything else you can imagine.
And what better way to demonstrate the command than with a quirky example? The goal here is to write the text “♥G'MIC♥”, where each letter is itself packed with smaller versions of that same letter! A silly idea, maybe—but why not? The following G'MIC script (test_pack_sprites.gmic), once made executable, does exactly that:
#!/usr/bin/env gmic
str="\20G'MIC\20"
repeat size(['$str']) {
l:=['$str'][$>]
0 text. {`$l`},0,0,${"font titanone,480"},1,1 ==. 0 channels. -3,0
0 text. {`$l`},0,0,${"font titanone,64"},1,${"-RGB"},255
pack_sprites.. .,5,25,3,1 remove.
}
append x to_rgb
output out.png
display
str="\20G'MIC\20"
repeat size(['$str']) {
l:=['$str'][$>]
0 text. {`$l`},0,0,${"font titanone,480"},1,1 ==. 0 channels. -3,0
0 text. {`$l`},0,0,${"font titanone,64"},1,${"-RGB"},255
pack_sprites.. .,5,25,3,1 remove.
}
append x to_rgb
output out.png
display
The generation takes only a few seconds, and produces something like this:
Fun, isn’t it? Now the real question: how would you achieve the same thing in another language—and how many lines of code would it take? 😉
4. Using G'MIC for Creative Coding
The previous example is truly representative of the possibilities for writing custom scripts that G'MIC allows. Did you know, for instance, that all 640 filters available in the G'MIC-Qt plugin are written in this language?G'MIC can therefore be seen as a toolbox provided for those wishing to explore creative coding and generative art. Below we provide a few simple examples of image generation using G'MIC scripts, to give a quick overview of the language’s capabilities and conciseness.
4.1. Examples of Image Generation
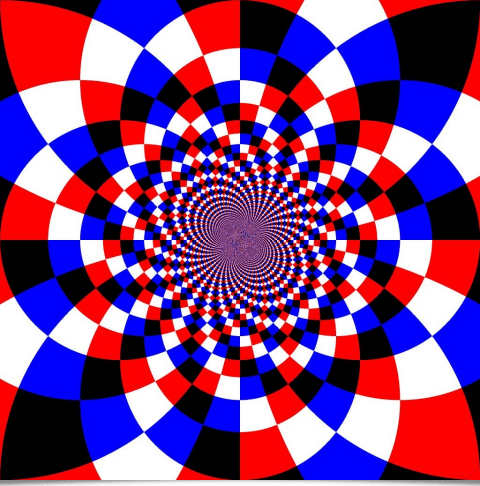
Color Checkerboard Inversion: This example is inspired by this excellent recent video by mathematician and popularizer Mickaël Launay (Micmaths). In G'MIC, the following function synthesizes an image equivalent to the one shown in the video (but with four colors instead of two).
invert_checkerboard :
4096,4096,1,1,"
L = clog(20*([x,y]/w - 0.5));
P = cexp([log(40/exp(L[0])),L[1]]);
85*xor(P[0]%4,P[1]%4)"
map 6 rescale2d 50%
4096,4096,1,1,"
L = clog(20*([x,y]/w - 0.5));
P = cexp([log(40/exp(L[0])),L[1]]);
85*xor(P[0]%4,P[1]%4)"
map 6 rescale2d 50%
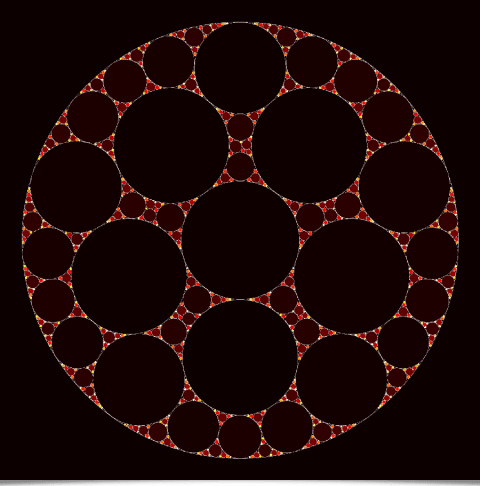
Apollonian Circles: In this example, smaller and smaller circles are packed into a base circle to generate fractal images. The G'MIC script performing this task is:
apollonian_gasket :
# Init.
siz=1280 rad:=$siz/2.2
$siz,$siz,1,2
circle {[$siz,$siz]/2},$rad,1,1
repeat 5 { circle {[$siz,$siz]/2+0.537*$rad*cexp([0,90°+$>*72°])},{0.316*$rad},1,0,{2+$>} }
# Iterate.
ind=4 e " > Computing"
do {
sh 0 +distance. 0 x,y,r:="x = xM; y = yM; [ x,y,i(x,y) - 1 ]" rm[-2,-1]
circle $x,$y,$r,1,0,$ind ind+=1
e "\r > Computing "{`c=arg0(int($>/10)%4,124,47,45,92);[c,c==92?92:0]`}
} while $r>3
# Decorate.
k. channels 100%
+n. 0,255 map. hot
l[0] { g xy,1 a c norm != 0 * 255 to_rgb }
max rs 80%
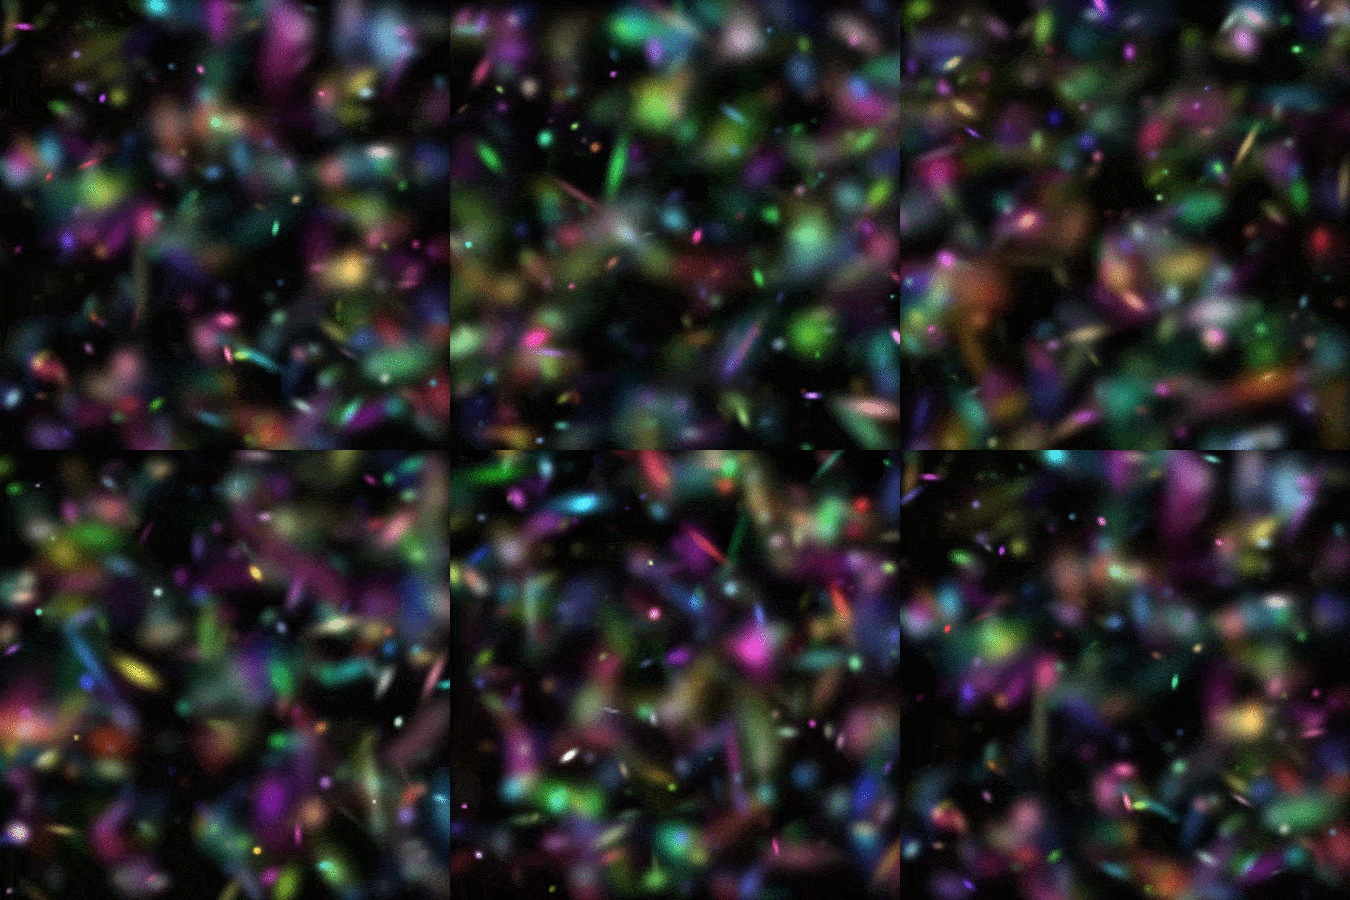
3D Gaussians: Here we aim to draw small anisotropic 3D Gaussian functions of various sizes, orientations, and colors in a discrete 3D volume, ensuring periodicity along the z-axis (depth). Then, slices of this volume are converted into video frames to produce the following animation.
gaussians3d :
180,180,160,3
2000,1,1,1,":
draw_gauss3d(ind,xc,yc,zc,u,v,w,siz,anisotropy,R,G,B,A) = (
unref(dg3d_mask,dg3d_one,dg3d_rgb,dg3d_isiz2);
dg3d_vU = unitnorm([ u,v,w ]);
dg3d_vUvUt = mul(dg3d_vU,dg3d_vU,3);
dg3d_T = invert(dg3d_vUvUt + max(0.025,1 - sqrt(anisotropy))*(eye(3) - dg3d_vUvUt));
dg3d_expr = string('T = [',v2s(dg3d_T),']; X = ([ x,y,z ] - siz/2)/siz; exp(-12*dot(X,T*X))');
dg3d_mask = expr(dg3d_expr,siz,siz,siz);
dg3d_rgb = [ vector(##siz^3,R),vector(##siz^3,G),vector(##siz^3,B) ];
const dg3d_isiz2 = int(siz/2);
draw(#ind,dg3d_rgb,xc - dg3d_isiz2,yc - dg3d_isiz2,zc - dg3d_isiz2,0,siz,siz,siz,3,A/255,dg3d_mask);
# Trick: These two lines allow to generate a perfectly looping animation.
draw(#ind,dg3d_rgb,xc - dg3d_isiz2,yc - dg3d_isiz2,zc - dg3d_isiz2 + d#0/2,0,siz,siz,siz,3,A/255,dg3d_mask);
draw(#ind,dg3d_rgb,xc - dg3d_isiz2,yc - dg3d_isiz2,zc - dg3d_isiz2 - d#0/2,0,siz,siz,siz,3,A/255,dg3d_mask);
);
X = [ u([w#0,h#0] - 1),u(d#0/4,3*d#0/4) ];
U = unitnorm([g,g,g]);
siz = v(5);
anisotropy = u(0.6,1);
R = u(20,255);
G = u(20,255);
B = u(20,255);
A = u(20,255)/(1 + siz)^0.75;
siz==0?draw_gauss3d(#0,X[0],X[1],X[2],U[0],U[1],U[2],11,anisotropy,R,G,B,A):
siz==1?draw_gauss3d(#0,X[0],X[1],X[2],U[0],U[1],U[2],21,anisotropy,R,G,B,A):
siz==2?draw_gauss3d(#0,X[0],X[1],X[2],U[0],U[1],U[2],31,anisotropy,R,G,B,A):
siz==3?draw_gauss3d(#0,X[0],X[1],X[2],U[0],U[1],U[2],41,anisotropy,R,G,B,A):
siz==4?draw_gauss3d(#0,X[0],X[1],X[2],U[0],U[1],U[2],51,anisotropy,R,G,B,A):
draw_gauss3d(#0,X[0],X[1],X[2],U[0],U[1],U[2],61,anisotropy,R,G,B,A)"
rm.
rs 250%,250%,6 c 0,255 normalize_local , n 0,255
slices {[d/4,3*d/4-1]}
Watch this full screen for 20 minutes before going to bed, listening to Pink Floyd, and I guarantee a good night’s sleep!
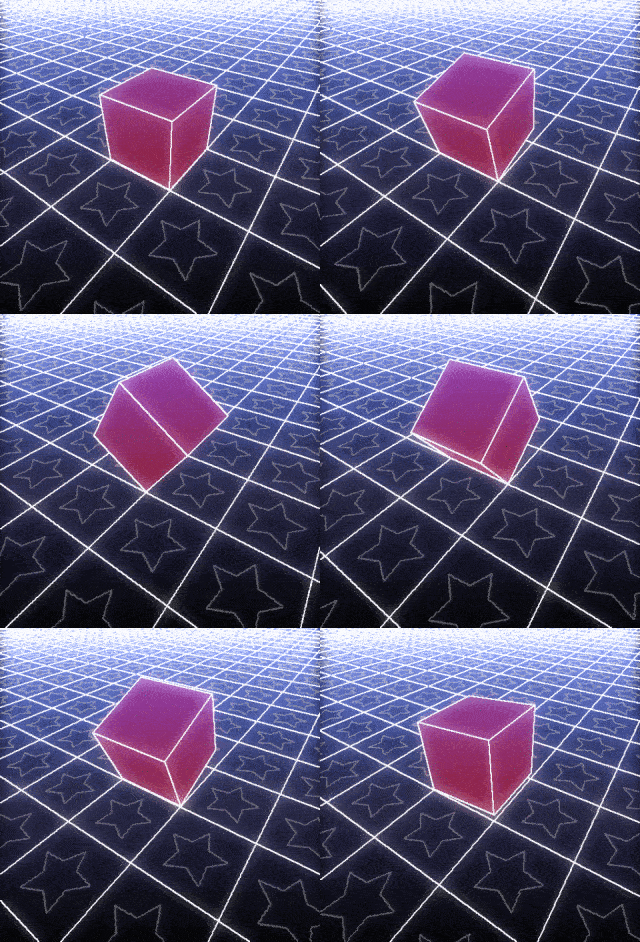
Rolling Cube: As mentioned in section 3.2, G'MIC has its own 3D rendering engine, which we use here to generate this simple, perfectly looping animation:
The source code for this effect is a bit longer than the previous examples, so we don’t include it directly here. But at just 47 lines, it’s still quite reasonable 😊!
And if, like me, you enjoy watching or creating fun/strange images or animations generated in just a few lines of code, feel free to check out the dedicated discussion thread on the official G'MIC forum: Creative Coding with G'MIC.
4.2. The “G'MIC Adventures” Series
The possibilities offered by G'MIC for creative coding led us to start a small series of posts, titled G'MIC Adventures. The idea of this series is to explain and illustrate the different steps from concept to implementation of a creative coding effect as a G'MIC script. Currently, the series has only 4 episodes, but we hope to expand it in the future. The episodes are as follows:G'MIC Adventures #1: A fake 3D extrusion filter (2.5D): This episode explains how the 2.5D extrusion filter presented earlier (Fig. 2.4.4) was conceived and implemented.
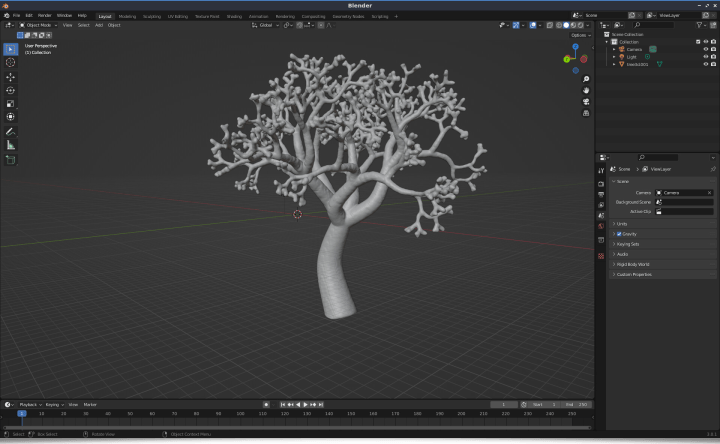
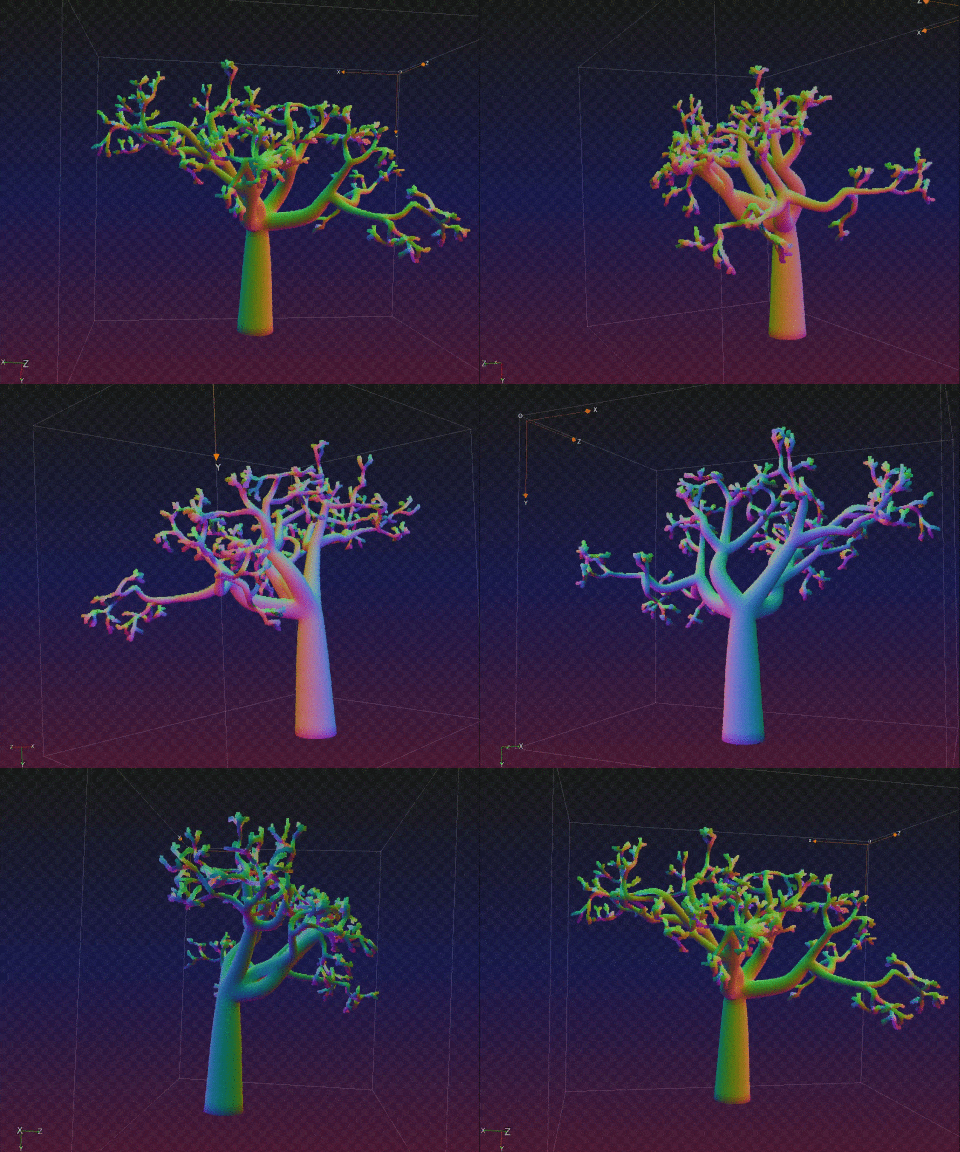
G'MIC Adventures #2: Building 3D trees: In this episode, we show how to implement the generation of a 3D fractal tree (more precisely, a 3D variant of a fractal canopy) procedurally, to produce 3D meshes of random trees.
G'MIC Adventures #3: (Pseudo)-Diffusion-Limited Aggregation: This episode explores diffusion-limited aggregation processes and one of its fast approximations, using a particle system to synthesize a 3D cluster, as shown in the following animation:
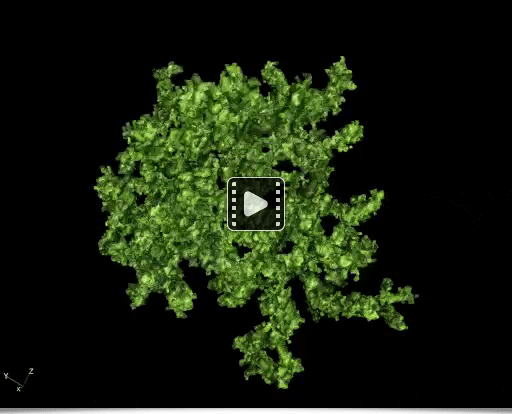
Fig. 4.2.3. Synthetic forest moss-like structure generated by 3D particle aggregation. Inhalation of vapors from this moss is strongly discouraged!
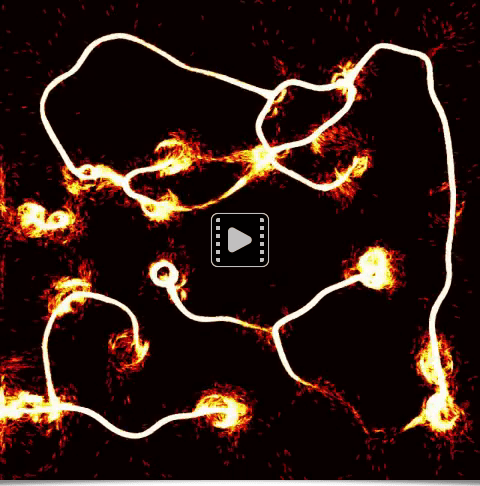
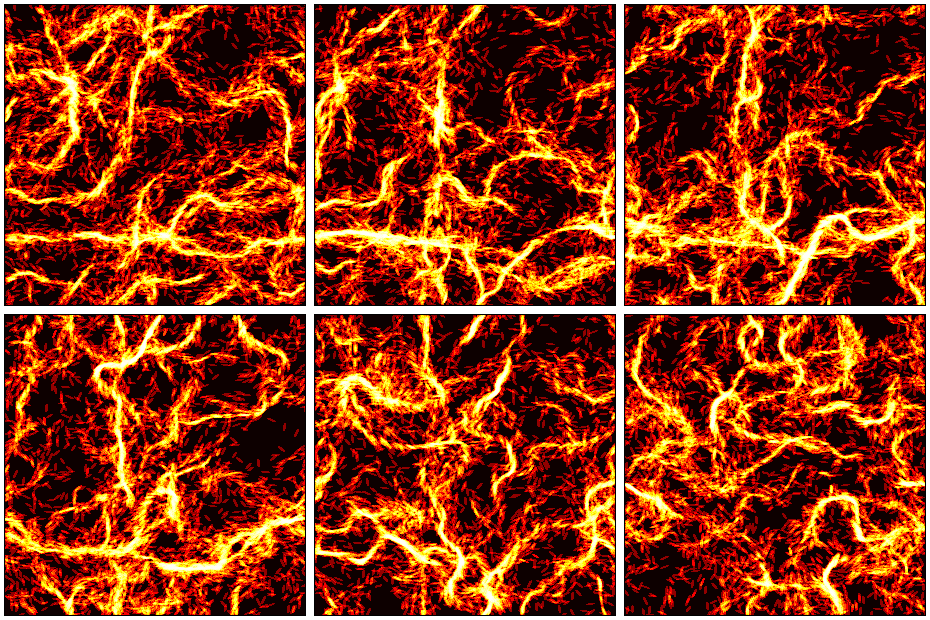
This episode explores the creation of another particle system, the Physarum algorithm introduced in this paper by Jeff Jones in 2010. Here, millions of particles are launched, which self-organize to follow a path that becomes common to all particles after a number of iterations, allowing the generation of quite remarkable 2D animations, such as these:
In this episode, we also explore a 3D extension of this algorithm, allowing the generation of animations like this:
All of these episodes demonstrate that G'MIC is a versatile toolbox, quite fun to use, for creative prototyping in image and animation generation!
5. Additional Resources
We have already reached the fifth section of this post, which probably means it’s time to wrap it up 😉. To finish, here are some additional information and interesting links for further exploring the G'MIC project:First, let's mention the publication “G'MIC: An Open-Source Self-Extending Framework” by D. Tschumperlé, S. Fourey, and G. Osgood, published in January 2025 in the journal JOSS (The Journal of Open Source Software). This article describes the general motivations of the project and provides an overview of its global architecture and some of its capabilities. This also allows the G'MIC project to have its “reference” article in a scientific journal (and therefore be cited more easily).
G'MIC also now has accounts (mirrored) on social networks X and Bluesky, in addition to the main account on Mastodon. This is simply because we discovered cross-posting tools 😊. We mainly use these social networks to provide frequent updates about the project and its development. Feel free to follow them if you want to stay informed about G'MIC!
Finally, a list of links we found interesting:
YouTube video: G'Mic In Krita a Beginner’s Guide by MossCharmly presents.
YouTube video: Adding GMIC Plug-In for Photoshop & Affinity Photo 2 by Stephen - Photo Artist.
YouTube video: 600+ Artistic Filters - GMIC Tutorial for Affinity Photo by Technically Trent.
Tutorial: Compiling G'MIC for Android by Hagar H.
6. Conclusions and Perspectives
The release of version 3.6 (and more generally the year 2025) represents an important milestone in the life of the G'MIC project.Firstly, because after 17 years of development, it is clear that G'MIC is now stable, and perhaps it is time to highlight its existing features rather than trying to implement new functionalities at all costs. Secondly, the loss of our friend Sébastien, in addition to being a major emotional shock, may make the maintenance and future evolution of the G'MIC-Qt plugin difficult. And finally, with the widespread adoption of generative AI, the fields of image analysis, processing, and generation (especially for creative purposes) are undergoing deep changes, and G'MIC features could very well be considered obsolete in a few years (or not 😊).
In the end, so many uncertainties and questions! This makes the directions for G'MIC future evolution unclear, especially since managing such a project requires a huge time investment, while its financial return remains nonexistent.
Currently, G'MIC is downloaded slightly over 1,000 times per day from the main project webpage (not counting third-party installations: via Krita, official distribution packages, etc.). This is a very respectable figure for a free software of this kind, developed within a public research lab like GREYC, and moreover, maintained by a single person.
In the short term, the focus will probably be on promoting and increasing the visibility of the framework, maintaining the code, and engaging the community—for example by writing tutorials illustrating its many potential applications in various fields of digital imaging: photo retouching, illustration, digital painting, scientific imaging (medical, astronomy, biology, materials), graphic design, generative art, etc.
In the long term, can we reasonably hope to do more with G'MIC given our limited resources?
Time will tell!
7. Previous G’MIC News Posts
If you enjoyed this post and want to look back at the history of G’MIC through earlier announcements, here are the previous news articles celebrating past milestones:G’MIC 2.3.6 - 10 Years of Open Source Image Processing! - 10 years.
G’MIC 2.7 - Process Your Images with Style - 11 years.
G’MIC 3.0.0 - A Third Dose to Process Your Images! - 13 years.
G’MIC 3.2.5 - 15 Years of Development for Open and Reproducible Image Processing - 15 years.
G’MIC 3.4.0 - Image Processing in Its Prime! - 16 years.


 Home
Home News
News Download
 Resources
 Technical Reference
 Scripting Tutorial
 Video Tutorials
 Wiki Pages
 Image Gallery
 Color Presets
 Using libgmic
 G'MIC Online
 Community
 Discussion Forum (Pixls.us)
 GimpChat
 IRC
IRC Report Issue